-
Scallops with Roasted Fennel & Spring Peas

Mid-March. The time of year when one day the weather is in the 20’s and the next it’s in the 70’s. The anticipation of Spring and Summer grows significantly around this time and so does the appetite for lighter, fresher meals. These Scallops with Roasted Fennel & Spring Peas definitely hits the mark and are perfect for a simple at home date night or luncheon with the girls.
To make this dish, you will need just a handful of simple ingredients- Scallops, Bacon, Fennel, Shallot, Garlic, Spring Peas, Olive Oil, Parsley, & Fresh Mint.
From start to finish, this dish is ready within a half hour and ready to serve. This recipe can also be easily modified to a great “Friday” meal for those of you observing Lent and avoiding meats by simply removing the bacon and replacing the bacon fat with a tablespoon or so of butter (or Olive Oil if you’re watching your waistline!).
Scallops with Roasted Fennel & Spring Peas
Prep Time 10 minutesCook Time 20 minutesTotal Time 30 minutesServings 2Ingredients
- 10 Sea Scallops Side Muscle Removed
- 1 Bulb Fennel Trimmed and Sliced
- 1 Shallot Sliced
- 3 Cloves Fresh Garlic Unpeeled
- 1 Bag Frozen Spring Peas
- 3-4 Strips Bacon
- 4 TBSP Olive Oil
- 4 Leaves Fresh Mint Chiffonade
- 1 TSP Fresh Parsley Chopped
- Salt & Pepper To Taste
Instructions
-
Pre-heat oven to 425 Degrees. Remove peas from the freezer to begin thawing.
In a small baking dish, add sliced shallots, fennel, and garlic cloves (peel on) and coat with 2 TBSP olive oil, salt and pepper. Roast in oven for approximately 20 minutes, stirring occasionally until lightly roasted and golden brown.
While the fennel mixture is roasting in the oven, gently rinse the Scallops and remove any side muscle still attached. Transfer scallops onto a paper towel and pat dry. The scallops must be completely dry prior to searing or they will not develop the golden brown outer crust you are looking to achieve.
In a frying pan, sear the scallops in remaining 2 TBSP of Olive Oil for approximately 3 minutes per side or until golden brown crust has begun to appear. It is important not to overcrowd the pan or the scallops will steam instead of crisping up on the edges. As the scallops finish, transfer them onto a paper towel lined plate for later.
Using the same frying pan, add in slices of bacon and cook until fat has rendered out and bacon is crisp. Remove bacon and chop up for later topping.
Add peas to the frying pan with the bacon fat and cook until completely defrosted and vibrant green in color. Season with salt & pepper.
Pull roasted fennel mixture out of the oven, remove garlic cloves, and add into the sauteed peas with about half of the chopped bacon, fresh parsley, and fresh mint. Toss together for another minute until well combined.
Transfer Pea mixture into a serving dish and top with scallops, remaining bacon, and fresh herbs to garnish. Serve warm-room temp.
-
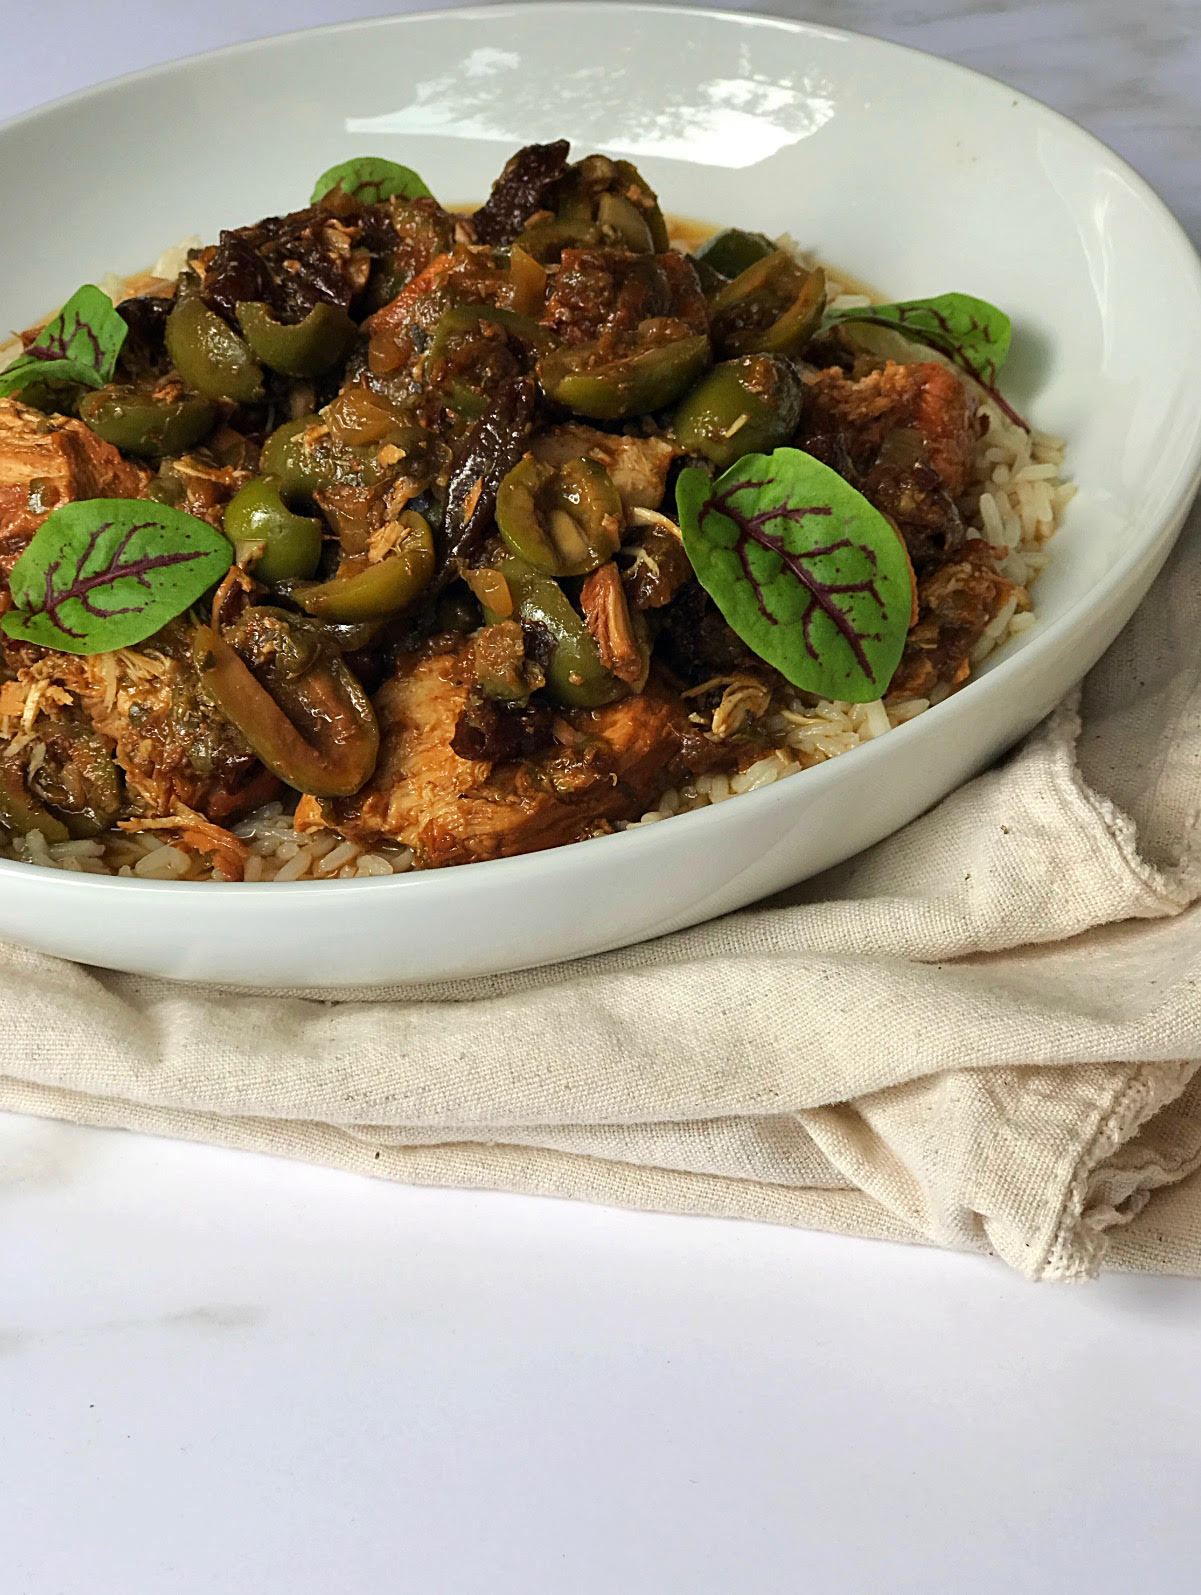
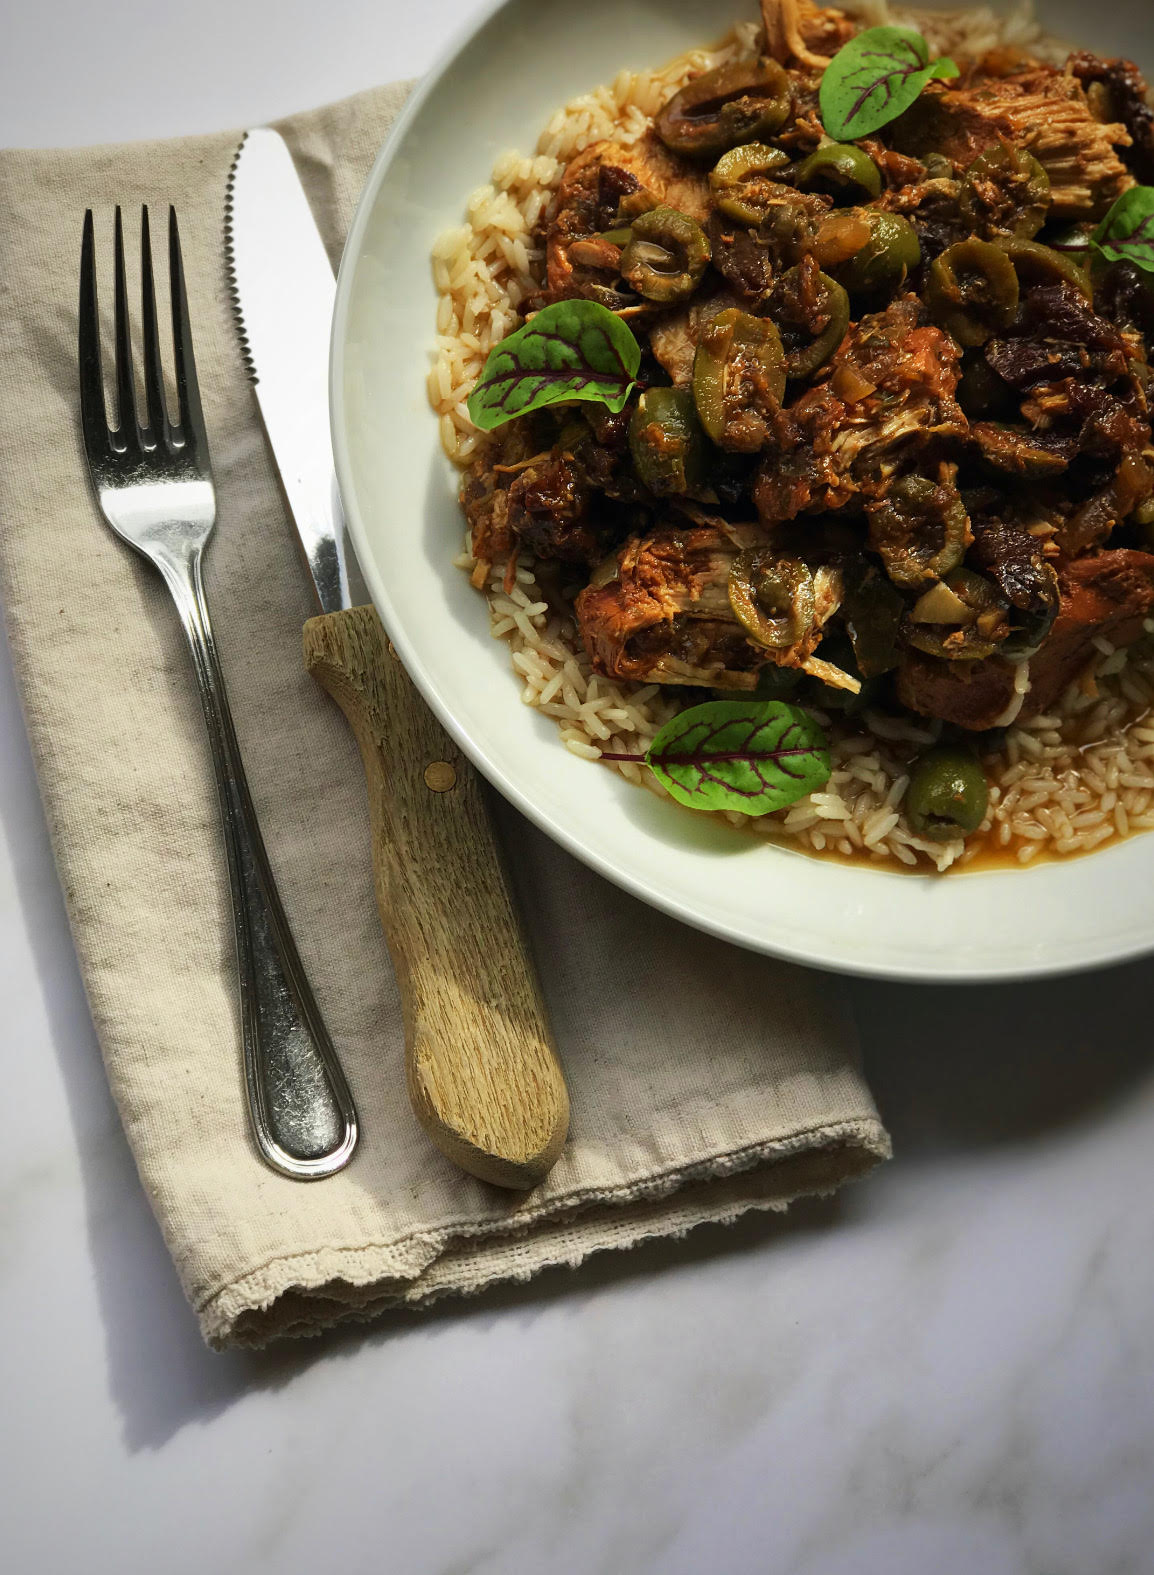
Chicken Marbella
You can not begin to imagine the smell in this house right now, or the taste of this Chicken Marbella recipe, that is, unless you’ve tried it for yourself.

This recipe is SO easy and delicious, especially for days when you plan to entertain guests and want to streamline the cooking process as much as possible. Being able to enjoy the company

of your guests without having to stand over a stove all evening is a gift, which, admittedly, I am guilty of.
There are several ways to prepare this dish- stovetop, oven, slow cooker, etc.
What remains the same are the handful of key ingredients- Capers, Prunes, Spanish Green Olives, Garlic, White Wine, Oregano, Brown Sugar, and of course- Chicken!
The type of chicken you prefer for this recipe and cooking method is up to you, but I personally prefer boneless skinless breast meat, which I cook in a Crock Pot for about 6 hours until the chicken becomes tender and flavors have penetrated through, leaving a flavorful finished product.
Chicken Marbella2018-10-07 18:05:11PrintIngredients- 1 Small Pack of Boneless Skinless (full sized) Chicken Breasts
- 1/4 Cup Capers
- 1/2 Cup Dried Prunes (sliced)
- 1/2 Cup Spanish Green Olives (pitted and halved)
- 4 Cloves of Garlic (smashed and rough chopped)
- 1 Shallot (sliced)
- 2 TSP Brown Sugar
- 2/3 Cup Extra Virgin Olive Oil
- 2 TSP Champagne Vinegar
- 1/4 Cup of White Wine (chardonnay)
- 1/2 Cup Chicken Stock
- 1/2 TSP Dried Oregano
- 4 Bay Leaves
- Salt & Pepper (to taste)
Instructions- Clean and cut chicken breasts in half. Set aside.
- Into a mixing bowl, whisk together white wine, vinegar, olive oil, brown sugar, salt, pepper, garlic, & dried oregano.
- Toss together prunes, olives, capers, & shallots until well combined and transfer into a crock pot. Nestle in chicken breasts and pour liquid mixture over the top. Top off with chicken stock to submerge the chicken without completely covering the breasts.
- Add additional salt, pepper, and bay leaves.
- Cook on high for 5 1/2 hours stirring every hour and then break up chicken into smaller pieces with a fork. Let cook for another 30 minutes or so. Serve hot by itself or over rice.
saristotle https://saristotle.com/ -
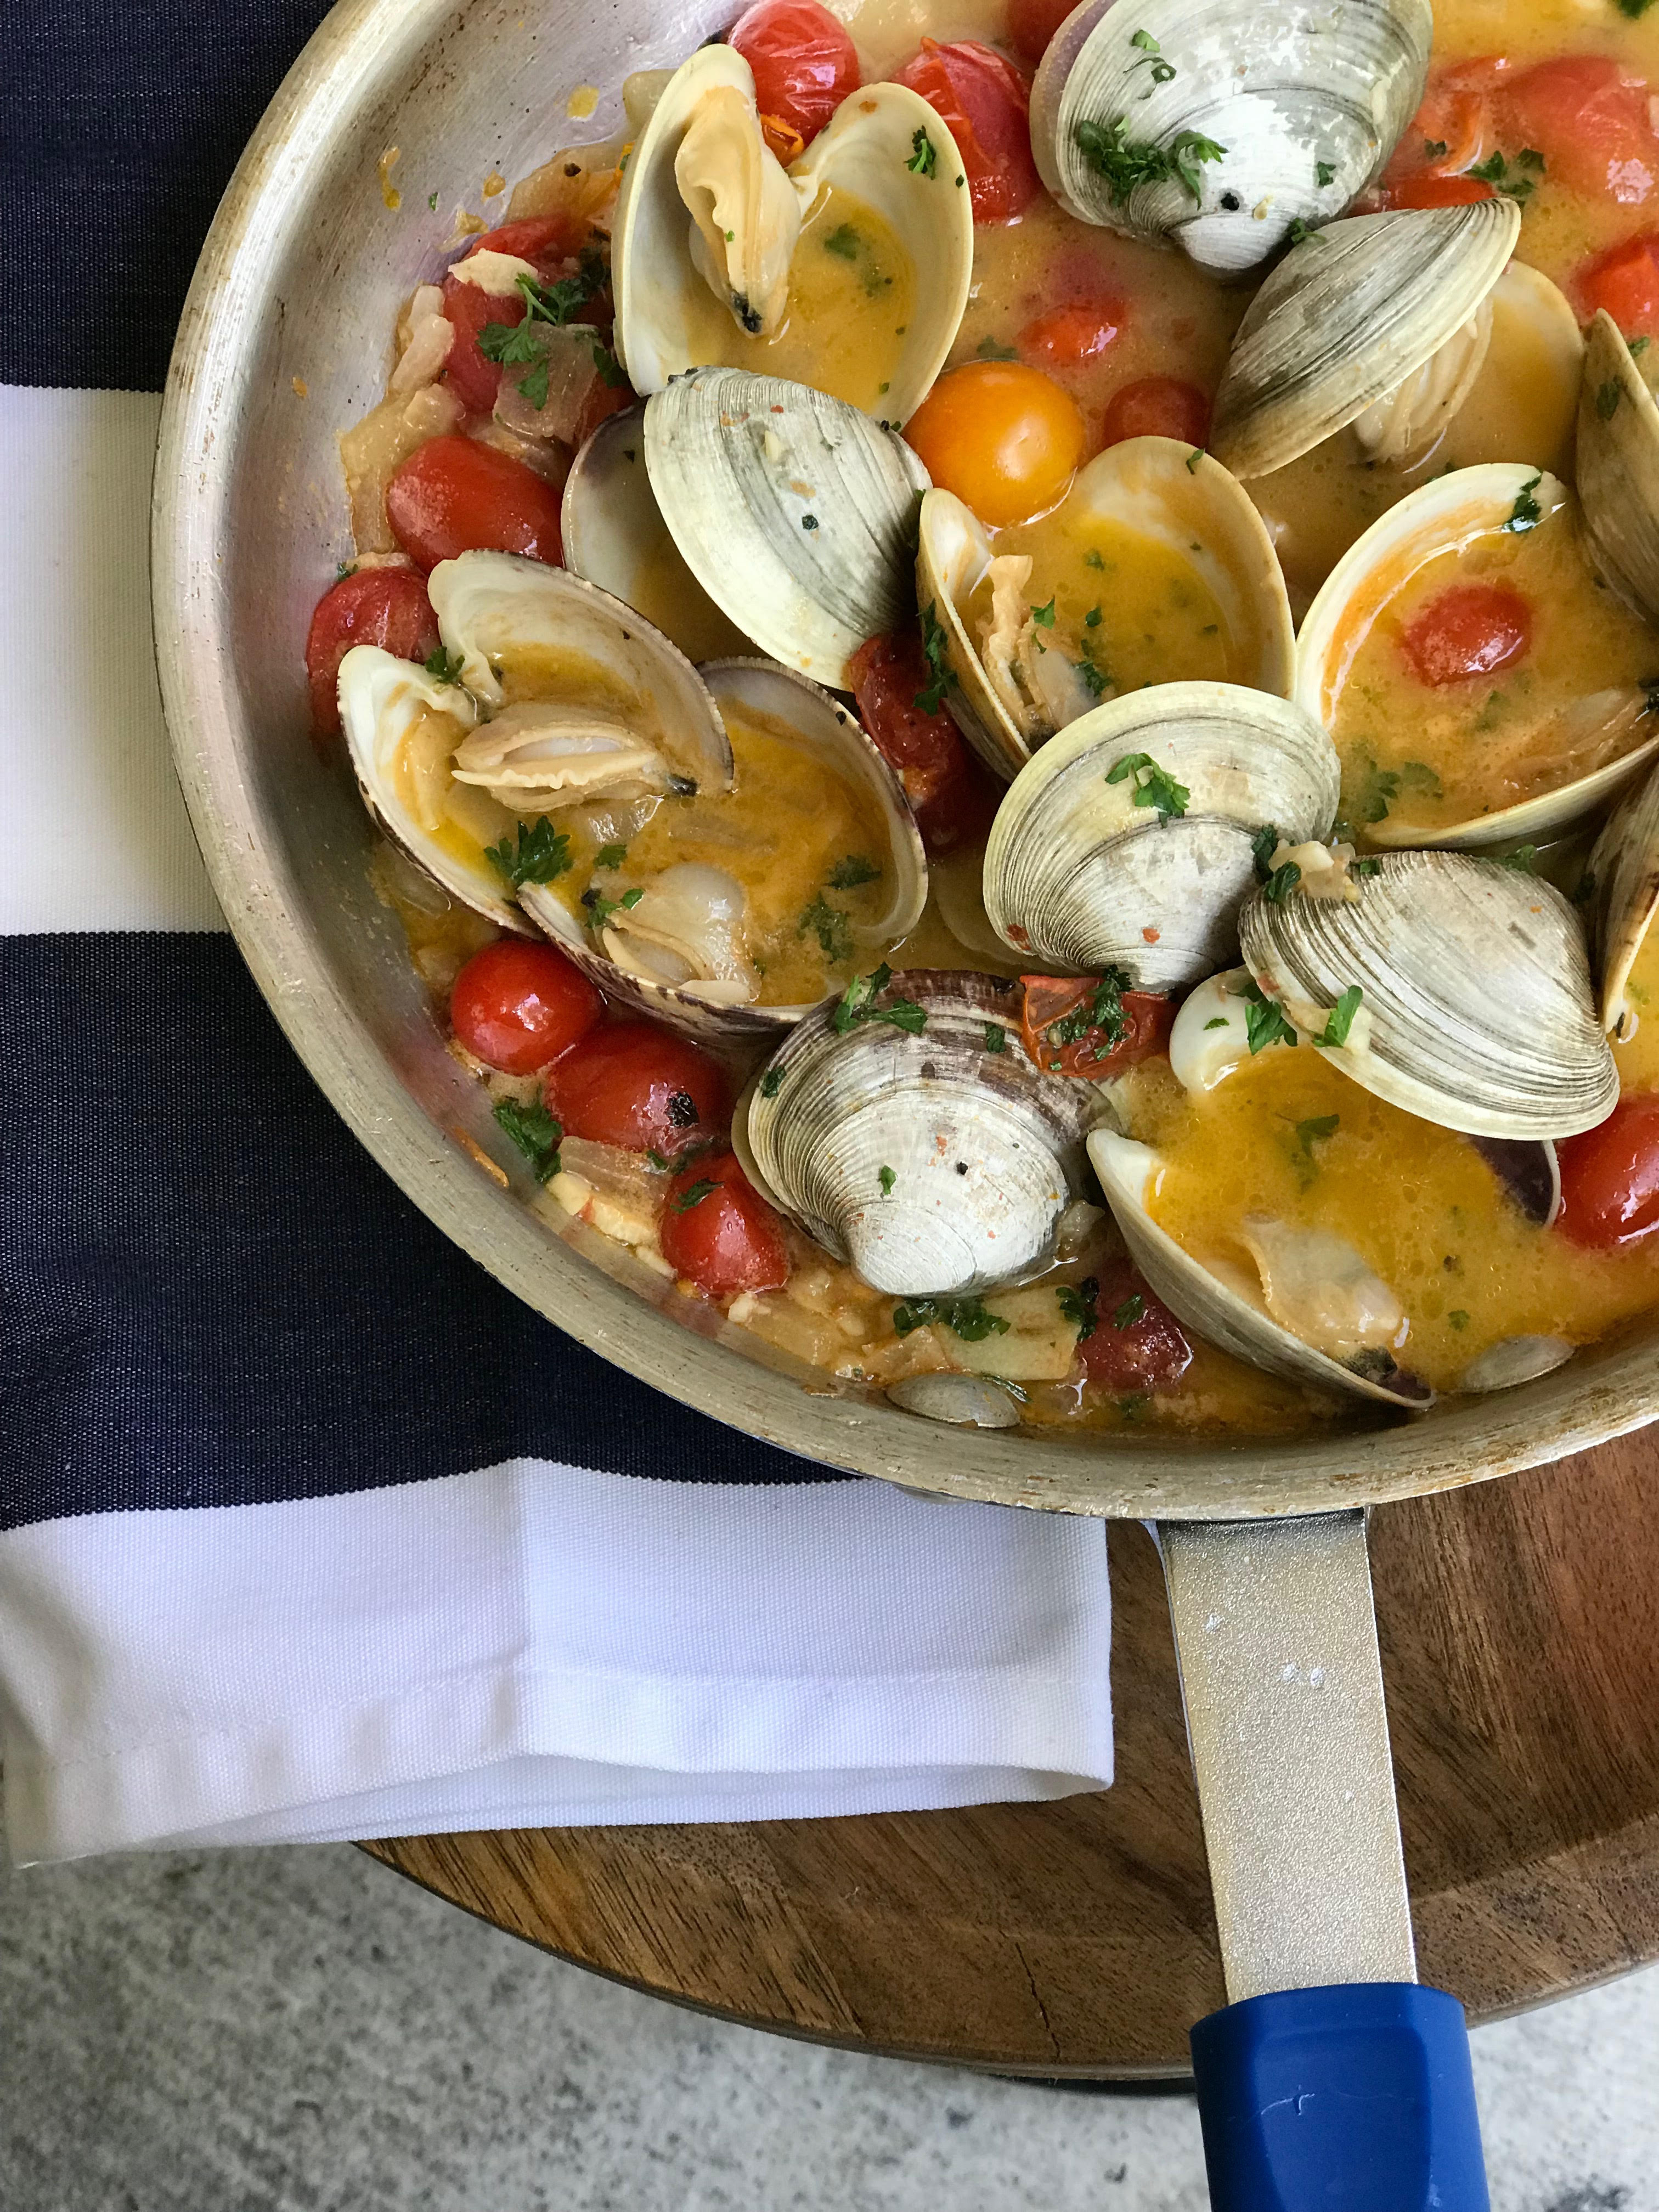
Fettuccine with Clams & Scallops
 Heavy pasta sauces have never been my style personally; For that reason, I am always looking for ways to create new dishes that are on the lighter side and can be made in a relatively short period of time. Fettuccine with Clams & Scallops is not only delicious, but is also surprisingly easy to throw together in a pinch.
The secret ingredient that really brings this dish together is Anchovy Paste, which provides a subtle, but necessary depth of flavor your guests can’t quite put their finger on. Other than that and fresh seafood, the handful of remaining ingredients are ones you probably already have in the house, and who doesn’t love that?
Fettuccine with Clams & Scallops2018-08-22 20:35:56PrintIngredients- 3 TBSP Butter
- 1/4 Cup Olive Oil
- 7 Cloves of Garlic (smashed and sliced)
- 1 Shallot (small diced)
- 20 Cherry Tomatoes (Red & Yellow)
- 1 DZN Clams
- 6-8 Scallops
- 1.5 TSP Anchovy Paste
- 2/3 Cup White Wine (Chardonnay)
- 2 Cups Chicken Stock
- Fresh Parsley (garnish)
- Salt & Pepper (to taste)
- 1 LB Fettuccine
Instructions- Salt a large pot and boil water. Add Fettuccine and cook for 2 minutes less than package instructions- the pasta will finish cooking in the sauce later.
- Scrub and soak clams, setting aside until later.
- In a medium pan (medium/high heat), add olive oil and saute garlic and shallots until light golden brown. Add a few shakes of crushed red pepper (optional), anchovy paste, and cherry tomatoes. Stir for a moment, then add white wine- reduce by half, and add in 1 TBSP of butter. Cook for 3-4 minutes or until tomatoes have begun to break down.
- Add chicken stock and bring to a boil. Lower the heat, add salt and pepper, and continue to simmer for about 6-8 more minutes until flavors are well- combined.
- Add clams to broth mixture along with one more TBSP of butter and cook until all clams have popped open and are fully cooked.
- In the meantime, pat dry scallops and season on both sides with salt and pepper. Add 1 TBSP of butter into a different pan over medium/high heat and sear scallops (depending on size) for 2-4 minutes on each side. Set aside for plating.
- Remove the clams from the pan to make room for adding back in the pasta, which will finish cooking in the sauce. Top with fresh chopped Parsley and toss.
- Plate the pasta and the sauce and top with the clams, scallops, and more parsley. Serve hot.
saristotle https://saristotle.com/ -
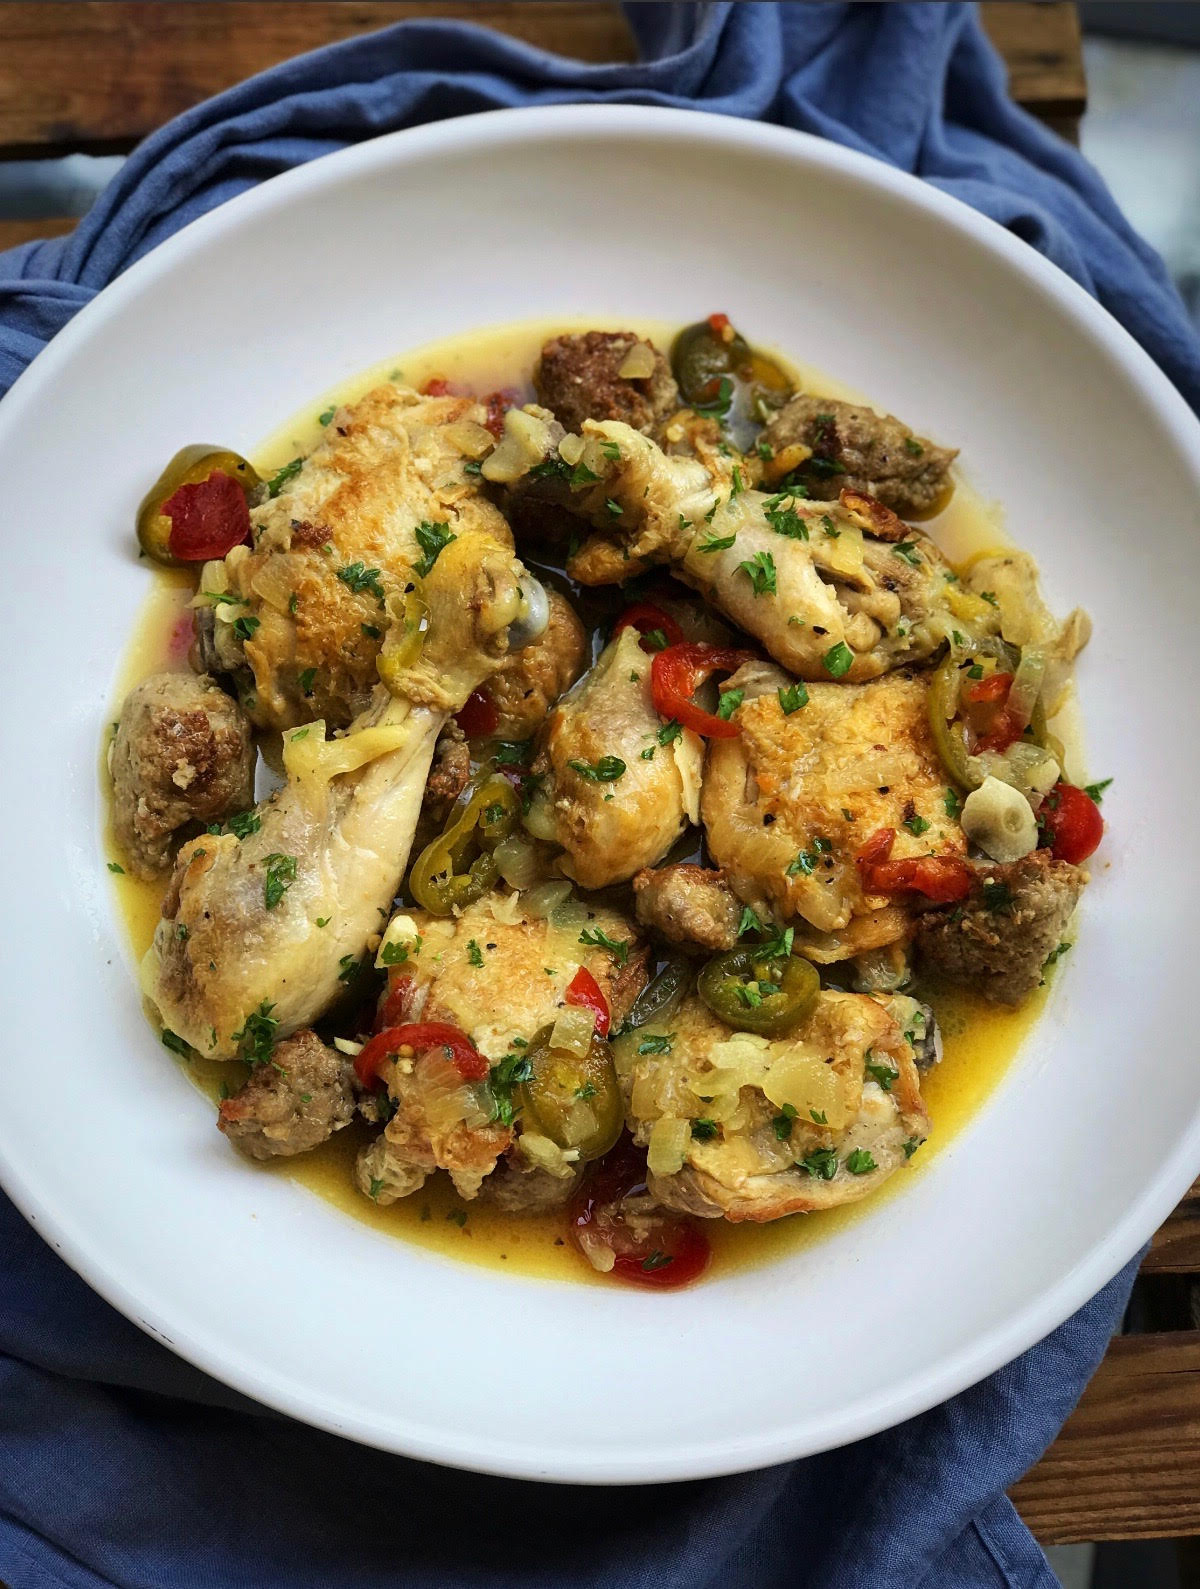
Chicken Scarpiello
When I think of comfort food, one of the first dishes that comes to mind is Chicken Scarpiello. This has been a long time favorite since the first time I tried it a few years back.

Anytime I eat something out that I enjoy, I always make it a point to come home and recreate my own variation.
If you’re like me and enjoy food with a little bit of a kick, this is a recipe for you. With fall off the bone chicken pieces, Italian sausage, and a buttery white wine, garlic, and hot pepper broth, this dish is a winner every time.
While this is certainly not one of my more simplistic “weeknight” meals, it is definitely one to keep in the recipe box for those days when you have a bit more time on your hands or are entertaining and want to serve a restaurant quality entree that’ll be sure to impress your guests (not to mention make the house smell ahhhmazinggg). Now all we need is a loaf of bread to sop up all of the delicious sauce- am I right?
Chicken Scarpiello2018-08-22 20:38:14PrintIngredients- Chicken Drumsticks (6 Pieces)
- Chicken Thighs (4 Pieces)
- 1 Small Pack Sweet Italian Sausage (6 Links- Casings Removed)
- 4 Cloves of Garlic (Sliced)
- 1 Small Yellow Onion (Diced)
- 3/4 Cup White Wine
- 5 TBSP Butter
- 2 Cups Chicken Stock
- 1/4 Cup Hot Cherry Pepper Slices
- 1/4 Cup Hot Cherry Pepper Juice
- Salt & Pepper to Taste
- Olive Oil
Instructions- Rinse chicken pieces and dry (well) with a paper towel. This is important in making sure the chicken has a good crust on it to lock in moisture during the searing process to follow.
- Remove casings from sausage and pull apart into 3-4 pieces. Set aside.
- In a large frying pan over medium/high heat, add 1/4 Cup of Olive Oil and a TBSP of Butter- melt down. Once the pan is hot, add chicken pieces, skin side down, and cook for approx. 3-4 minutes on each side or until the skin has become crisp and medium golden brown in color.
- Remove the par-cooked chicken from the frying pan onto a paper towel lined baking sheet (see notes).
- In a separate frying pan or dutch oven pot, add a TBSP of olive oil and the sausage and cook until caramelized on all sides. Transfer onto a paper towel to blot up any excess oil.
- In the same pot, add a fresh TBSP of Olive Oil and sauté fresh garlic and onions until light golden brown.
- Add white wine and reduce down for 2-3 minutes. Add 3 TBSP of butter and stir to combine. Add chicken stock, cherry pepper juice, and cherry pepper slices and bring to a boil. Add chicken pieces and sausage back into the pot, and reduce heat to low and cover with a lid.
- Simmer for 45 minutes or until sausage is fully cooked and chicken begins to pull away from the bone.
- Season with salt and pepper and stir. Cover again and cook for an additional 15 minutes.
- Transfer to a serving dish and enjoy hot over rice or potatoes.
Notes- **The searing of the chicken will likely need to be done in a few batches. DO NOT overcrowd the pan or the chicken will steam instead of fry and skin will never crisp up. This is an important step in making sure the chicken locks in moisture and will have the "fall off the bone" consistency you are looking for in the finished dish.
- **If you have a splatter screen on hand USE IT- this dish, especially during the searing off of the chicken and sausage will pop hot oil out of the pan so brace yourselves!
saristotle https://saristotle.com/ -
Italian Style Sausage & Peppers
One Italian staple everyone should have a good recipe for is Sausage & Peppers. There are several ways to prepare this dish, but the typical differentiating factor is whether or not it’s being served in a tomato sauce. Most times, we tend to follow what has been prepared by family members over the years as a starting point.

For me, this preparation has been one I always resort back to when having having company over because it is SO easy and always a crowd pleaser. The best part (arguably) of this dish is how simple it is to prepare over other Sausage & Pepper recipes you may come across. The reason being is that this recipe is made entirely in one pan at the same time. The fact that it goes for two hours in the oven, requiring only an occasional stir truly makes this a “one-pot wonder.”

To put this together, you will simply only need a few bell peppers, onion, garlic, potatoes, sausage (casings removed), olive oil, garlic powder, salt & pepper. Toss together in a disposable aluminum pan and roast at 375 degrees for 2 hours (or until potatoes are fork-tender and sausage is a dark golden brown). Drain any excess oil from the bottom of the pan then serve on its own or on a fresh hoagie roll.
Italian Style Sausage & Peppers2018-05-13 17:53:39PrintIngredients- 12 Pork Sausages- Hot or Sweet (casings removed)
- 2 Green Bell Peppers
- 2 Red Bell Peppers
- 2 Yellow Onions
- 4-5 Russet Potatoes (skins removed)
- 3 Cloves of Garlic (whole)
- 1/2 Cup Extra Virgin Olive Oil
- Garlic Powder, Salt & Course Ground Black Pepper (to taste)
Instructions- Preheat oven to 375 degrees.
- Peel skin on potatoes and medium dice. Place into a bowl of cold water to prevent discoloration while prepping the remaining ingredients.
- Slice bell peppers into strips (being careful to exclude any seeds and inner white membrane). Slice onions into evenly sized slices. Peel garlic, leaving whole and transfer all into a large mixing bowl.
- Remove casings on sausages and pull into 4 smaller pieces. Add to same mixing bowl with the vegetables.
- Coat with Olive Oil, salt, pepper, and garlic powder and toss mixture together until well- combined. Empty contents into a large aluminum (or whatever you have on hand) roasting pan and spread into an even layer.
- Stir every half hour for approximately two hours or until the sausage has become a deep golden brown and the potatoes are fully cooked.
- Drain any excess oil from the bottom of the pan.
- Serve on its own or with hoagie rolls.
saristotle https://saristotle.com/ -
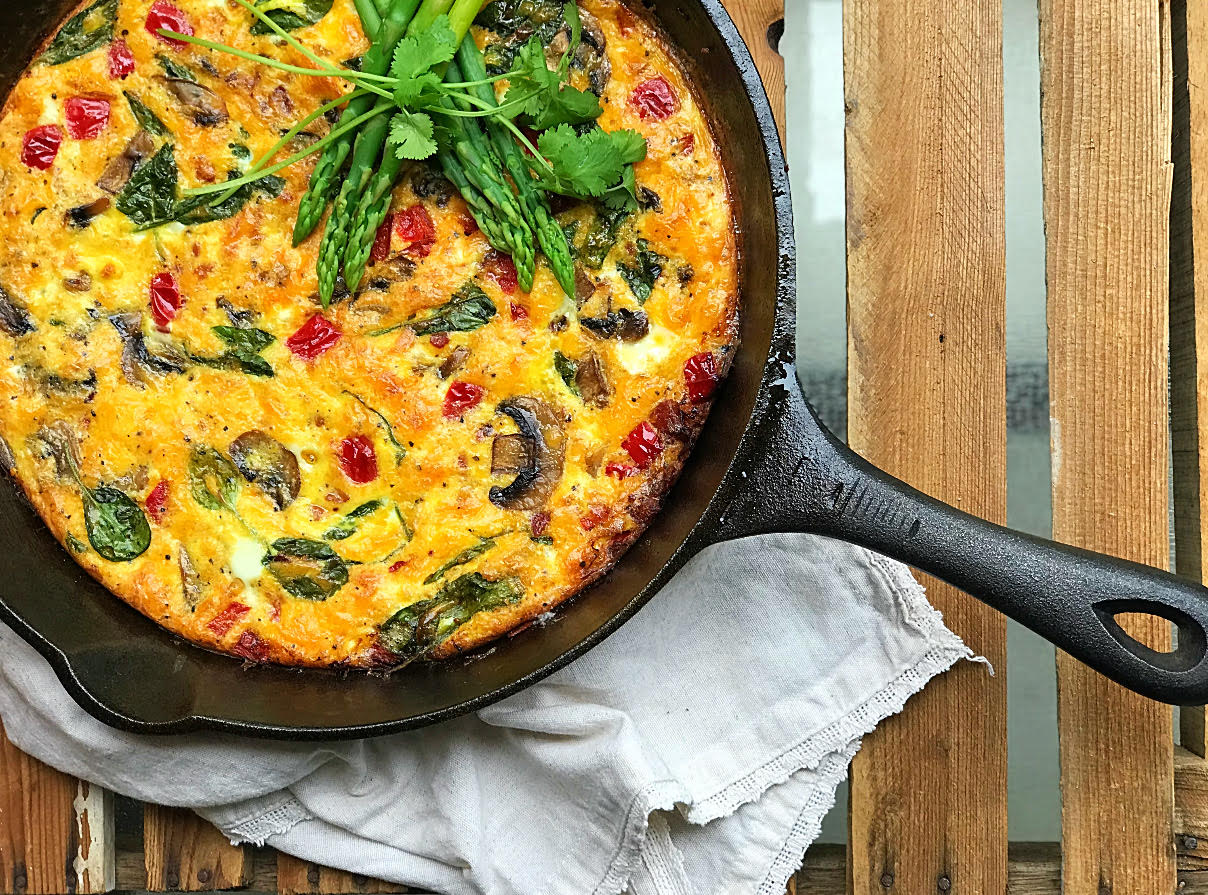
Cast Iron Southwest Frittata
One of my favorite things about cooking is that you can pull inspiration from anywhere whether it be a restaurant you’ve gone to, a country you’ve visited, a new person you’ve met, a special occasion, or even something as simple as driving past a farm market and having a little extra time on your hands (for once!) which was me this afternoon. Enter the Cast Iron Southwest Frittata.

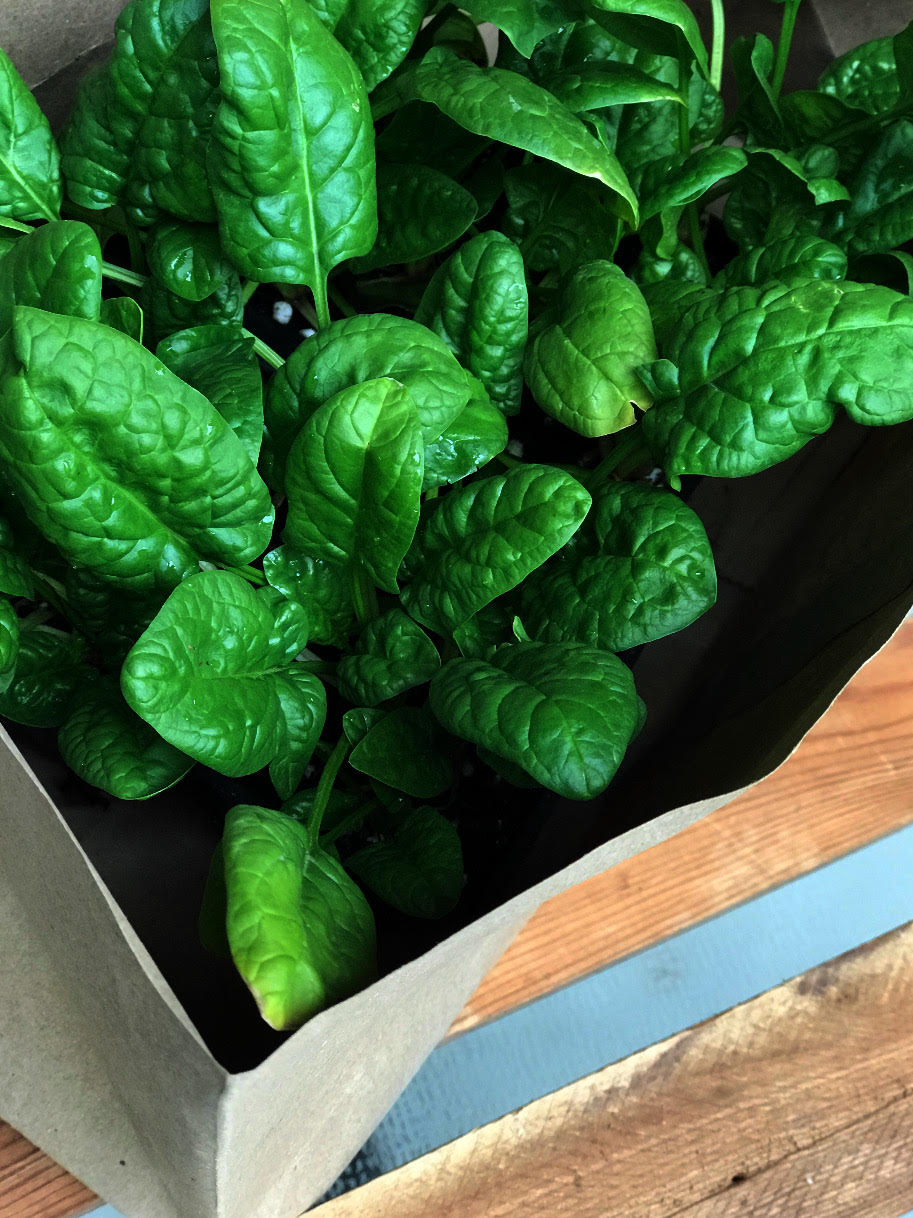
In addition to the vibrant hanging flowers, I noticed they were also selling fresh salad greens. I knew the Spinach would go great in a frittata and already had the remaining ingredients on hand so everything came together effortlessly. Plus, with Mother’s Day quickly approaching, it was the perfect time (if ever) to prepare this thoughtful and delicious brunch recipe.

Southwestern flavors pair extremely well with eggs, which is why you’ll often find them on the menu at your local breakfast spot. Similar to an omelette, frittatas can have endless variations, and are known to be that “garbage disposal” dish you make when you’ve got random odds and ends you’re not quite sure what to do with.

This recipe in particular is one that you can never go wrong with- and the upside? It appeals to a wide audience so if your family is a little on the picky side (like mine) everyone will be sure to enjoy!
Cast Iron Southwest Frittata2018-05-12 22:35:13PrintIngredients- 4 Strips of Bacon
- 1 Shallot (sliced)
- 1 Clove of Garlic (sliced)
- 3 Button Mushrooms (sliced)
- 1/2 Red Bell Pepper (diced)
- 1 Cup Fresh Spinach
- 1 TBSP Extra Virgin Olive Oil
- 1 TBSP Vegetable Oil
- Salt & Pepper (to taste)
- 8 Eggs
- 1/2 Cup Milk
- 1 Cup Shredded Cheddar Cheese
Instructions- Preheat oven to 350 Degrees.
- Coat a seasoned cast-iron skillet with vegetable oil (see notes).
- In a separate frying pan, cook bacon and remove when crisp, leaving remaining fat renderings in the pan. Give a rough chop. To the same pan, add mushrooms, garlic, shallots, and olive oil. Sweat down and remove from heat. Add red bell peppers and sauté until they lose their hard crunch (about 3-4 minutes), then remove from pan.
- In a mixing bowl, whisk together eggs, milk, Cheddar, salt & pepper. Set aside.
- Place the original cast iron skillet over medium heat until pan is hot and transfer mushrooms, garlic, shallots, and red bell peppers into skillet. Add baby spinach and sauté for approximately 30 seconds until leaves begin to wilt, but still hold their shape. Pour egg mixture into cast iron skillet and stir to combine all ingredients evenly.
- Place skillet into oven and cook for 30-35 minutes or until golden brown on top and cooked through (using a toothpick to check doneness- if the toothpick pulls out dry, the center is fully cooked).
- Use a butter knife to free sides from the skillet and a rubber spatula if needed to gently remove any additional sticking without breaking the frittata.
- Being careful not to burn yourself in the process, top with a piece of parchment paper and flip onto a serving platter. Serve hot or lukewarm.
Notes- Vegetable Oil has a higher smoking point than Olive Oil, meaning it will burn at a slower rate. This is necessary to make sure the skillet can get nice and hot without burning before the egg mixture is added.
saristotle https://saristotle.com/ -
Tomato Pesto with Toasted Pine Nuts
Many of the recipes I post can be put together in a relatively short period of time, because like you, I also have a very demanding schedule and do not always have as much time as I’d like to spend cooking! One of these recipes is my “Tomato Pesto with Toasted Pine Nuts,” which is something I whip up quickly when short on time. From start to finish, this dish comes together in about 20 minutes, which even the Pizza delivery guy can’t compete with!

A misconception I often hear as to why many people don’t cook is that they feel it is too difficult and complicated or that it simply just takes too long to put together, when in reality it’s actually the opposite.
As long as you have a few basic techniques down and a couple of “go to” flavor profiles, you are sure to put together a great and flavorful dish every time. All you need is a bit of passion towards putting together a lovingly prepared meal, and the rest will follow organically.

The world is changing and our generation is advancing on to the newest trends, like meal delivery programs, for example. I mean, why not?? All of the ingredients are portioned ahead, the recipes crafted up by world renowned chefs to prepare in the comfort of our own homes, and with easy to follow “step by step” instructions, it’s a no-brainer, right?
These services are great, especially when factoring in the time saved by the skipped trip to the grocery store, but in the midst of convenience, I encourage everyone to not forget the importance of originality and the sense of pride attributed with a thoughtful, home cooked meal.
For another easy “Arugula Pesto” recipe, click here.
Tomato Pesto with Toasted Pine Nuts2018-05-06 16:11:19PrintIngredients- 3/4 Cup Fresh Basil
- 1/2 Cup Cherry Tomatoes (or any tomato will do)
- 2 Cloves Fresh Garlic
- 2/3 Grated Reggiano Parmesan
- 2/3 Toasted Pine Nuts
- 1 TSP Crushed Red Pepper
- 1 TSP Black Pepper
- 1 TSP Kosher Salt
- 2/3 Cup Extra Virgin Olive Oil
Instructions- In a frying pan over medium heat, toast pine nuts until golden brown, tossing often. While the pine nuts are toasting, assemble the remaining ingredients together (except for the tomatoes and olive oil) and transfer into a blender. Add in toasted pine nuts and slowly incorporate in the olive oil and tomatoes until desired consistency and color is achieved (should be a medium orange color when ready). Store in a refrigerator for up to a week or toss with hot pasta/over grilled chicken immediately.
Notes- **Depending on the type of tomato you are using or their hue, you may need less or more than the suggested amount to get the correct, medium orange color.
saristotle https://saristotle.com/