-
Scallops with Roasted Fennel & Spring Peas

Mid-March. The time of year when one day the weather is in the 20’s and the next it’s in the 70’s. The anticipation of Spring and Summer grows significantly around this time and so does the appetite for lighter, fresher meals. These Scallops with Roasted Fennel & Spring Peas definitely hits the mark and are perfect for a simple at home date night or luncheon with the girls.
To make this dish, you will need just a handful of simple ingredients- Scallops, Bacon, Fennel, Shallot, Garlic, Spring Peas, Olive Oil, Parsley, & Fresh Mint.
From start to finish, this dish is ready within a half hour and ready to serve. This recipe can also be easily modified to a great “Friday” meal for those of you observing Lent and avoiding meats by simply removing the bacon and replacing the bacon fat with a tablespoon or so of butter (or Olive Oil if you’re watching your waistline!).
Scallops with Roasted Fennel & Spring Peas
Prep Time 10 minutesCook Time 20 minutesTotal Time 30 minutesServings 2Ingredients
- 10 Sea Scallops Side Muscle Removed
- 1 Bulb Fennel Trimmed and Sliced
- 1 Shallot Sliced
- 3 Cloves Fresh Garlic Unpeeled
- 1 Bag Frozen Spring Peas
- 3-4 Strips Bacon
- 4 TBSP Olive Oil
- 4 Leaves Fresh Mint Chiffonade
- 1 TSP Fresh Parsley Chopped
- Salt & Pepper To Taste
Instructions
-
Pre-heat oven to 425 Degrees. Remove peas from the freezer to begin thawing.
In a small baking dish, add sliced shallots, fennel, and garlic cloves (peel on) and coat with 2 TBSP olive oil, salt and pepper. Roast in oven for approximately 20 minutes, stirring occasionally until lightly roasted and golden brown.
While the fennel mixture is roasting in the oven, gently rinse the Scallops and remove any side muscle still attached. Transfer scallops onto a paper towel and pat dry. The scallops must be completely dry prior to searing or they will not develop the golden brown outer crust you are looking to achieve.
In a frying pan, sear the scallops in remaining 2 TBSP of Olive Oil for approximately 3 minutes per side or until golden brown crust has begun to appear. It is important not to overcrowd the pan or the scallops will steam instead of crisping up on the edges. As the scallops finish, transfer them onto a paper towel lined plate for later.
Using the same frying pan, add in slices of bacon and cook until fat has rendered out and bacon is crisp. Remove bacon and chop up for later topping.
Add peas to the frying pan with the bacon fat and cook until completely defrosted and vibrant green in color. Season with salt & pepper.
Pull roasted fennel mixture out of the oven, remove garlic cloves, and add into the sauteed peas with about half of the chopped bacon, fresh parsley, and fresh mint. Toss together for another minute until well combined.
Transfer Pea mixture into a serving dish and top with scallops, remaining bacon, and fresh herbs to garnish. Serve warm-room temp.
-
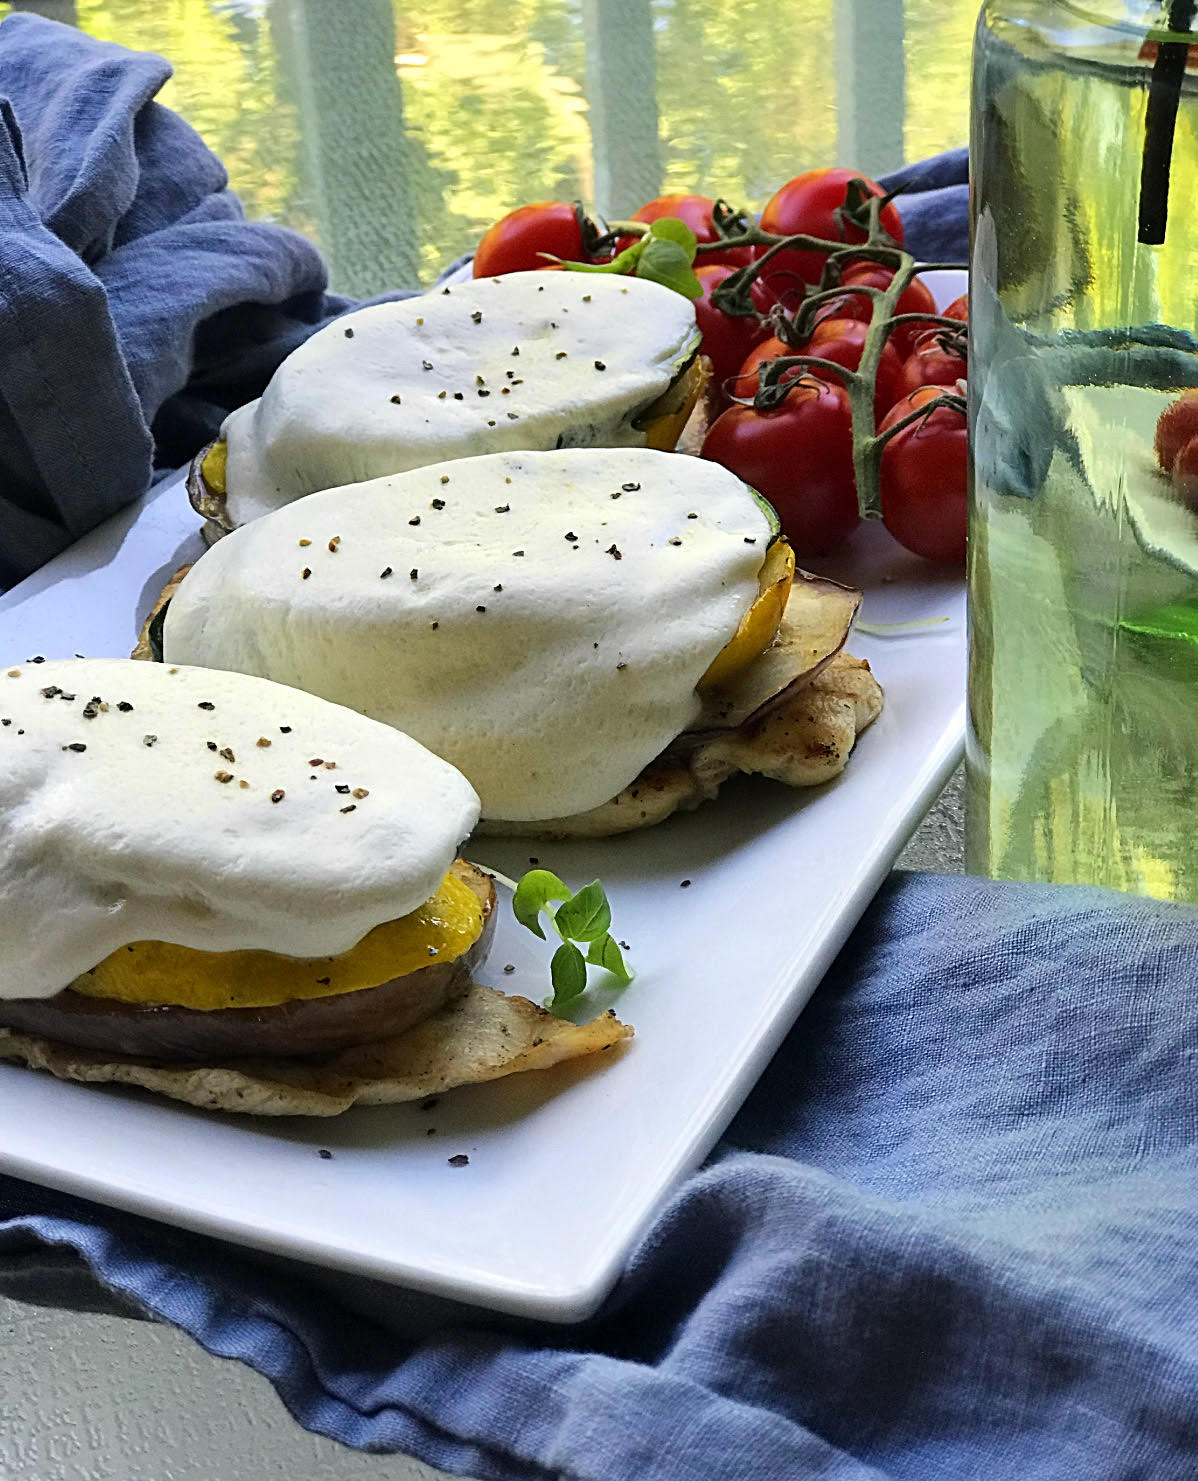
Chicken Napoleon
 My first “real” job out of college was doing weddings and social events for a banquet hall in Central New Jersey. One of the “perks” of this job was having our executive chef cook a staff lunch at the venue each day. While everything he made was exceptional and highly anticipated, the one dish I could never get enough of was his Chicken Napoleon.
The grilled Eggplant, Zucchini, Yellow Squash, and Chicken breasts stacked atop each other, capped with melted Fresh Mozzarella was just so incredibly fresh and satisfying. Finding a balance of healthy and delicious is a rarity, which makes this dish a staple in my house.
When I left that job for a new opportunity in 2015, I was determined to make my own version of the recipe so I could continue to enjoy it for years to come. Fast forward to 2018 and I remain in the business of catering. While my wealth of knowledge and introduction to new foods has increased over the years, this is still one of my favorite “go-to” dinner options and I know you will enjoy it as much as I do!
Chicken Napoleon2018-06-14 18:08:48PrintIngredients- 6 Chicken Breasts, Thin Sliced
- 2 Yellow Squash
- 2 Zucchini
- 1 Large Eggplant
- 1 Ball of Fresh Mozzarella
- 1 Cup Chicken or Vegetable Stock
- Olive Oil, Salt, Pepper, & Garlic Powder (for seasoning)
- Nonstick Cooking Spray
Instructions- Preheat grill (to approximately 425-450 degrees for best grill marks)
- Preheat oven to 350 degrees
- Cut vegetables (skin on) into approx 1 inch thick slices, on a bias (diagonal cut rather than round disks) for a larger surface area.
- Toss the vegetables into a mixing bowl and coat with olive oil, salt, pepper, and garlic powder. Clean chicken breasts in cold water and dry with a paper towel. Season with salt and pepper. Set aside.
- Slice fresh mozzarella into 3/4 inch thick slices- one slice per chicken breast and set aside.
- Spray grill with nonstick cooking spray and add vegetables, cooking for approximately 2 minutes per side until grill marks appear, but still remain "al dente."
- Once vegetables are removed from the grill, coat with fresh cooking spray and add the chicken. Cook for approximately 4-5 minutes per side or until fully cooked through.
- Add stock to the bottom of a 10x15 glass baking dish to prevent sticking and drying out. Lay chicken breasts on the bottom of the dish and stack the eggplant, zucchini, and squash slices (one per piece of chicken). Top with a medallion of fresh mozzarella and place into hot oven.
- Cook for approximately 8-10 minutes or until cheese has melted, but not browned.
- Serve hot.
Adapted from Executive Chef Michael GonzalesAdapted from Executive Chef Michael Gonzalessaristotle https://saristotle.com/