-
Grilled Chicken & Succotash Salad
Something about this time of year makes me long for healthier lunch or dinner options, and this Grilled Chicken & Succotash Salad is the perfect solution to that craving.
We all say we are going to cut back a bit in the Summer months- after all- it is beach season, right?? But with an even busier social life between family and friends- the barbeques, the “catching up with old friends” dinners, ice cream shops calling your name, the desire for a greasy slice of pizza after a night out of drinking only makes it more difficult to eat “clean” this time of year.

We all need a collection of quick recipes to throw together in place of the traditional “Hot Dogs and Hamburgers” we are so prone to jump to during the hot Summer months, this way we can offset the other meals we indulge in throughout the day or weekend so we don’t have to feel guilty about them. Life is about balance.
This recipe is a favorite of mine because it takes a very basic dish and elevates it to a higher level. It is delicious, bright, beautiful, simple, and will not overstuff you. Whether you are hosting guests or simply making a light lunch for yourself, it is sure to be a success.
This particular rendition is made with grilled Chicken, but also pairs great with grilled Salmon/Fish, or grilled Tofu- whichever you prefer. I did not add any Bacon or Pancetta to this dish, although many Succotash recipes will include some type of pork fat renderings and crispy bits to add texture and a smoky flavor profile. To each their own!
Grilled Chicken & Succotash Salad2018-05-28 18:07:14PrintSUCCOTASH SALAD- 3/4 Cup Edamame Beans (unsalted, shelled)
- 2 Ears of Corn on the Cob (grilled, kernels cut down from husk)
- 1 Shallot (sliced & grilled)
- 1/2 Red Bell Pepper (small dice)
- 1 TBSP Fresh Cilantro
- 1 TBSP Fresh Parsley
- 1 TBSP Extra Virgin Olive Oil
- Fresh Lemon Juice (light squeeze- to taste)
- Salt & Pepper (to taste)
- 3-4 Slices of Bacon (optional)
GRILLED CHICKEN- 4-6 Slices of Thin Sliced Chicken Breasts
- Kosher Salt & Coarse Ground Black Pepper (to taste)
- Nonstick Cooking Spray
SUCCOTASH SALAD- Preheat a nonstick grill pan or propane/charcoal grill until just about smoking hot for best grill marks.
- *THIS STEP IS OPTIONAL* In a small saute pan, fry 3-4 slices of Bacon until crisp and remove onto a paper towel lined plate. Once cooled, chop into smaller bits. Reserve any residual pan renderings for dressing.
- Coat Corn with Extra Virgin Olive Oil and add onto hot grill, turning every few minutes until marked on all sides. Remove from heat and (carefully, without burning your fingertips!) cut the kernels from the cob. Do the same with the sliced Shallots and once marked and removed from the grill- cut into small dices.
- Chop herbs and dice Red Bell Peppers. Add to a mixing bowl with the Edamame, Grilled Corn, & Shallots.
- Add salt, pepper, a squeeze of fresh Lemon juice, 1 TBSP of EVOO, and a light drizzle of the leftover fat renderings from the Bacon. Toss together well and taste for seasoning.
GRILLED CHICKEN- Clean Chicken and season with salt & pepper on both sides. Spray the hot grill with nonstick cooking spray and add the Chicken. After the first 2-3 minutes, turn Chicken on a slight angle for the "diamond" shaped grill marks. After another 2-3 minutes, flip the chicken over and do the same on both sides (see notes*)
Notes- If you prefer not to use bacon in the dish, feel free to eliminate that step and go straight to grilling the corn.
- *A propane/charcoal grill will hold a higher temperature than a grill pan. Please adjust timing as necessary depending on the heat source and thickness of the Chicken breasts.
saristotle https://saristotle.com/ -
Italian Style Sausage & Peppers
One Italian staple everyone should have a good recipe for is Sausage & Peppers. There are several ways to prepare this dish, but the typical differentiating factor is whether or not it’s being served in a tomato sauce. Most times, we tend to follow what has been prepared by family members over the years as a starting point.

For me, this preparation has been one I always resort back to when having having company over because it is SO easy and always a crowd pleaser. The best part (arguably) of this dish is how simple it is to prepare over other Sausage & Pepper recipes you may come across. The reason being is that this recipe is made entirely in one pan at the same time. The fact that it goes for two hours in the oven, requiring only an occasional stir truly makes this a “one-pot wonder.”

To put this together, you will simply only need a few bell peppers, onion, garlic, potatoes, sausage (casings removed), olive oil, garlic powder, salt & pepper. Toss together in a disposable aluminum pan and roast at 375 degrees for 2 hours (or until potatoes are fork-tender and sausage is a dark golden brown). Drain any excess oil from the bottom of the pan then serve on its own or on a fresh hoagie roll.
Italian Style Sausage & Peppers2018-05-13 17:53:39PrintIngredients- 12 Pork Sausages- Hot or Sweet (casings removed)
- 2 Green Bell Peppers
- 2 Red Bell Peppers
- 2 Yellow Onions
- 4-5 Russet Potatoes (skins removed)
- 3 Cloves of Garlic (whole)
- 1/2 Cup Extra Virgin Olive Oil
- Garlic Powder, Salt & Course Ground Black Pepper (to taste)
Instructions- Preheat oven to 375 degrees.
- Peel skin on potatoes and medium dice. Place into a bowl of cold water to prevent discoloration while prepping the remaining ingredients.
- Slice bell peppers into strips (being careful to exclude any seeds and inner white membrane). Slice onions into evenly sized slices. Peel garlic, leaving whole and transfer all into a large mixing bowl.
- Remove casings on sausages and pull into 4 smaller pieces. Add to same mixing bowl with the vegetables.
- Coat with Olive Oil, salt, pepper, and garlic powder and toss mixture together until well- combined. Empty contents into a large aluminum (or whatever you have on hand) roasting pan and spread into an even layer.
- Stir every half hour for approximately two hours or until the sausage has become a deep golden brown and the potatoes are fully cooked.
- Drain any excess oil from the bottom of the pan.
- Serve on its own or with hoagie rolls.
saristotle https://saristotle.com/ -
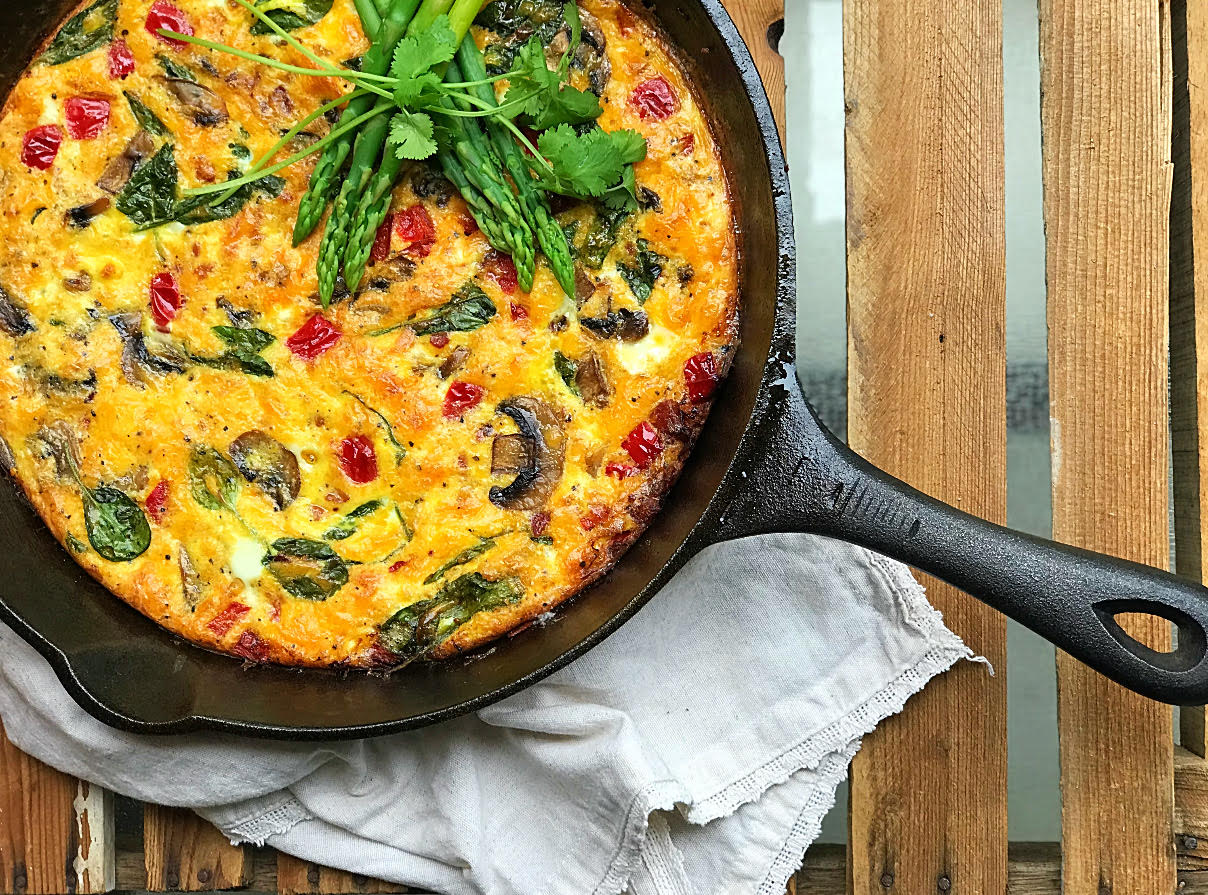
Cast Iron Southwest Frittata
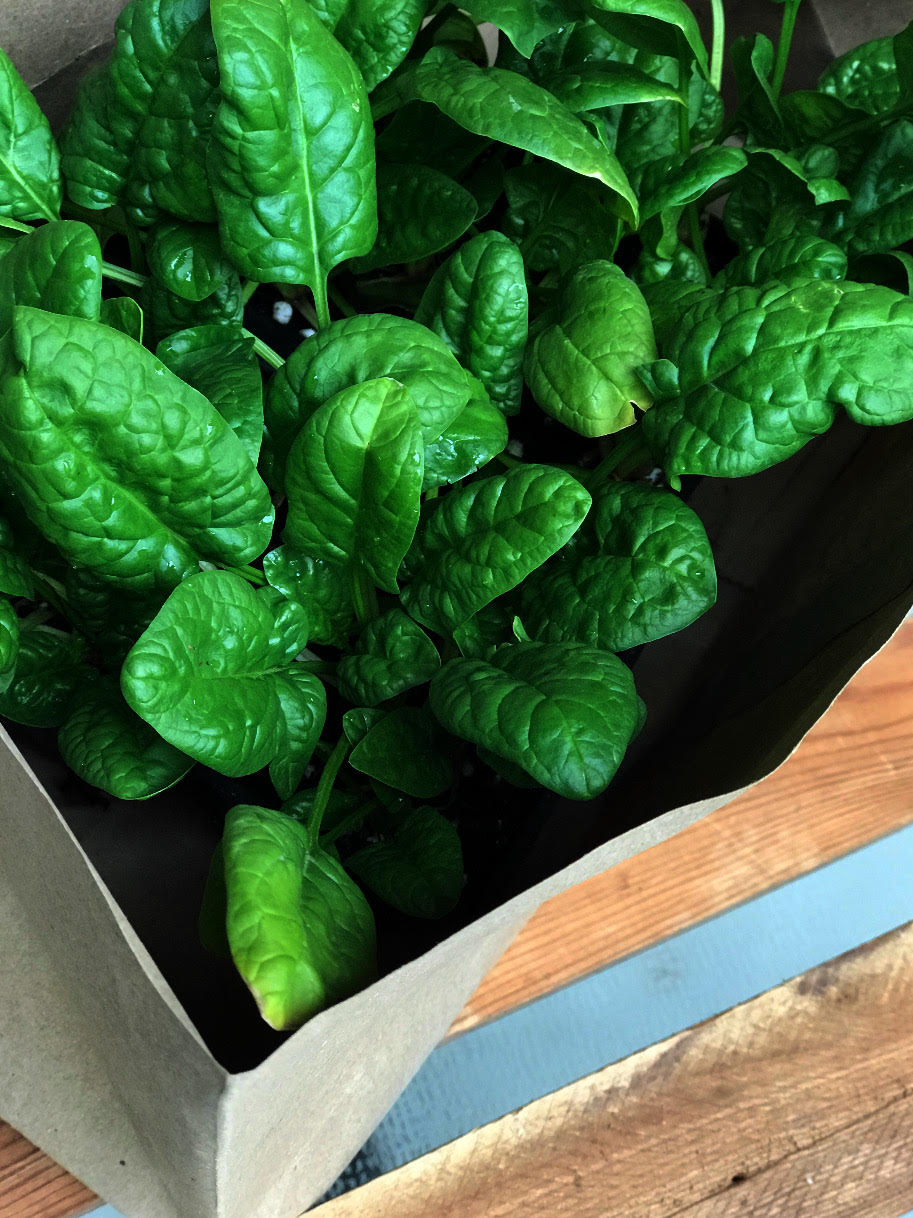
One of my favorite things about cooking is that you can pull inspiration from anywhere whether it be a restaurant you’ve gone to, a country you’ve visited, a new person you’ve met, a special occasion, or even something as simple as driving past a farm market and having a little extra time on your hands (for once!) which was me this afternoon. Enter the Cast Iron Southwest Frittata.

In addition to the vibrant hanging flowers, I noticed they were also selling fresh salad greens. I knew the Spinach would go great in a frittata and already had the remaining ingredients on hand so everything came together effortlessly. Plus, with Mother’s Day quickly approaching, it was the perfect time (if ever) to prepare this thoughtful and delicious brunch recipe.

Southwestern flavors pair extremely well with eggs, which is why you’ll often find them on the menu at your local breakfast spot. Similar to an omelette, frittatas can have endless variations, and are known to be that “garbage disposal” dish you make when you’ve got random odds and ends you’re not quite sure what to do with.

This recipe in particular is one that you can never go wrong with- and the upside? It appeals to a wide audience so if your family is a little on the picky side (like mine) everyone will be sure to enjoy!
Cast Iron Southwest Frittata2018-05-12 22:35:13PrintIngredients- 4 Strips of Bacon
- 1 Shallot (sliced)
- 1 Clove of Garlic (sliced)
- 3 Button Mushrooms (sliced)
- 1/2 Red Bell Pepper (diced)
- 1 Cup Fresh Spinach
- 1 TBSP Extra Virgin Olive Oil
- 1 TBSP Vegetable Oil
- Salt & Pepper (to taste)
- 8 Eggs
- 1/2 Cup Milk
- 1 Cup Shredded Cheddar Cheese
Instructions- Preheat oven to 350 Degrees.
- Coat a seasoned cast-iron skillet with vegetable oil (see notes).
- In a separate frying pan, cook bacon and remove when crisp, leaving remaining fat renderings in the pan. Give a rough chop. To the same pan, add mushrooms, garlic, shallots, and olive oil. Sweat down and remove from heat. Add red bell peppers and sauté until they lose their hard crunch (about 3-4 minutes), then remove from pan.
- In a mixing bowl, whisk together eggs, milk, Cheddar, salt & pepper. Set aside.
- Place the original cast iron skillet over medium heat until pan is hot and transfer mushrooms, garlic, shallots, and red bell peppers into skillet. Add baby spinach and sauté for approximately 30 seconds until leaves begin to wilt, but still hold their shape. Pour egg mixture into cast iron skillet and stir to combine all ingredients evenly.
- Place skillet into oven and cook for 30-35 minutes or until golden brown on top and cooked through (using a toothpick to check doneness- if the toothpick pulls out dry, the center is fully cooked).
- Use a butter knife to free sides from the skillet and a rubber spatula if needed to gently remove any additional sticking without breaking the frittata.
- Being careful not to burn yourself in the process, top with a piece of parchment paper and flip onto a serving platter. Serve hot or lukewarm.
Notes- Vegetable Oil has a higher smoking point than Olive Oil, meaning it will burn at a slower rate. This is necessary to make sure the skillet can get nice and hot without burning before the egg mixture is added.
saristotle https://saristotle.com/ -
Tomato Pesto with Toasted Pine Nuts
Many of the recipes I post can be put together in a relatively short period of time, because like you, I also have a very demanding schedule and do not always have as much time as I’d like to spend cooking! One of these recipes is my “Tomato Pesto with Toasted Pine Nuts,” which is something I whip up quickly when short on time. From start to finish, this dish comes together in about 20 minutes, which even the Pizza delivery guy can’t compete with!

A misconception I often hear as to why many people don’t cook is that they feel it is too difficult and complicated or that it simply just takes too long to put together, when in reality it’s actually the opposite.
As long as you have a few basic techniques down and a couple of “go to” flavor profiles, you are sure to put together a great and flavorful dish every time. All you need is a bit of passion towards putting together a lovingly prepared meal, and the rest will follow organically.

The world is changing and our generation is advancing on to the newest trends, like meal delivery programs, for example. I mean, why not?? All of the ingredients are portioned ahead, the recipes crafted up by world renowned chefs to prepare in the comfort of our own homes, and with easy to follow “step by step” instructions, it’s a no-brainer, right?
These services are great, especially when factoring in the time saved by the skipped trip to the grocery store, but in the midst of convenience, I encourage everyone to not forget the importance of originality and the sense of pride attributed with a thoughtful, home cooked meal.
For another easy “Arugula Pesto” recipe, click here.
Tomato Pesto with Toasted Pine Nuts2018-05-06 16:11:19PrintIngredients- 3/4 Cup Fresh Basil
- 1/2 Cup Cherry Tomatoes (or any tomato will do)
- 2 Cloves Fresh Garlic
- 2/3 Grated Reggiano Parmesan
- 2/3 Toasted Pine Nuts
- 1 TSP Crushed Red Pepper
- 1 TSP Black Pepper
- 1 TSP Kosher Salt
- 2/3 Cup Extra Virgin Olive Oil
Instructions- In a frying pan over medium heat, toast pine nuts until golden brown, tossing often. While the pine nuts are toasting, assemble the remaining ingredients together (except for the tomatoes and olive oil) and transfer into a blender. Add in toasted pine nuts and slowly incorporate in the olive oil and tomatoes until desired consistency and color is achieved (should be a medium orange color when ready). Store in a refrigerator for up to a week or toss with hot pasta/over grilled chicken immediately.
Notes- **Depending on the type of tomato you are using or their hue, you may need less or more than the suggested amount to get the correct, medium orange color.
saristotle https://saristotle.com/ -
Crispy Calamari Salad
WARNING: Stolen Salad Alert! This dish was not an original concoction, but instead a dish I often order at our local Gastropub- The Crosby in Montclair, NJ.
 After ordering about six appetizers with a girlfriend, I knew my entree would have to be on the lighter side so I went straight to the “salad” section of the menu and a certain one caught my eye. “Crackling Calamari Salad” with a Honey Lime Balsamic Vinaigrette, Bitter Greens, and Semolina Crusted Calamari. I had never heard or tasted anything like it before and knew that was what I was going to order.
 A few moments later, the woman sitting at the table next to us got her entree, and she ordered the same dish! It looked incredible so I was highly anticipating mine coming to the table. Low and behold, it tasted even better than it looked and I knew I would need to try to recreate the dish in my own home.
While my recipe is a bit of a “shortcut” and tweaked slightly, it is a delicious adaptation from the original and makes for a great light(ish) lunch or dinner.
Crispy Calamari Salad2018-04-29 15:12:50PrintSALAD- 2 Cups Frisee Lettuce (chopped)
- 1 Cup Radicchio (sliced down)
- 1 Cup Frozen Breaded Calamari (fried)
- 4 Cups Vegetable Oil
- Shaved Parmesan (topping)
- Aged Balsamic Glaze (drizzling)
WARM HONEY-LIME VINAIGRETTE- 1 Clove Fresh Garlic (smashed and finely chopped)
- 1 TBSP Shallots (finely chopped)
- Lime Zest (1 Lime)
- Lime Juice (1/2 Lime)
- 1 TSP Champagne Vinegar
- 1 TSP Dijon Mustard
- 1 TSP Water
- 2 TSP Honey
- 1 TSP Balsamic Glaze
- Salt & Pepper (to taste)
- 1/4 Cup Extra Virgin Olive Oil
SALAD- Rinse and chop salad greens and place into a mixing bowl. Set aside.
- Over medium heat, fry breaded calamari in Vegetable Oil (375 degrees F) for 3-4 minutes or until light golden brown and cooked through. Remove from oil using a slotted spoon and transfer onto a paper towel lined baking sheet- sprinkle with salt.
- Toss salad greens with vinaigrette. Drizzle Balsamic Glaze onto a serving platter and place a handful of greens onto the center of the plate. Top with warm calamari and fresh Parmesan Cheese.
WARM HONEY-LIME VINAIGRETTE- In a mixing bowl, add garlic, shallots, vinegar, honey, and lime zest/juice.
- In a frying pan, heat Olive Oil and add in the contents of the mixing bowl. Stir together until simmering. Add Dijon Mustard and Balsamic Glaze, whisking together until well combined. Remove from heat and transfer into a smaller bowl or dressing shaker. Add water, salt, and pepper. Pour over salad greens while still warm and toss well.
Adapted from The Crosby- Montclair, NJAdapted from The Crosby- Montclair, NJsaristotle https://saristotle.com/ -
Farro Salad with Arugula, Lemon Zest, Feta, & Pistachio

This grain salad is an easy side dish to throw together in lieu of the traditional “side salad” if you’re like me and like to break up the monotony of what a salad should or is expected to be. It is also a healthier and more nutritional option than the fatty mayonnaise based options.
Farro is a favorite grain of mine because of the nutty flavor and chewy texture that really satisfies. It is extremely versatile and can be paired with a number of different flavor profiles, or even be used for Risotto dishes. This preparation is a “go to” for me because it simply hits all the marks for me- whatever mood I’m in.
From the salty bite of Feta cheese paired with the peppery Arugula, sweet Pistachio, and tangy finish from the fresh Lemon Zest, the ingredients in this dish really work harmoniously together. Pair with a Honey- Lemon Vinaigrette to complete the dish.
Farro Salad with Lemon Zest, Feta, & Pistachio2018-04-28 11:10:44PrintSALAD- 1 Cup Farro
- 4 Cups Water
- 1 Cup Chicken (or Veggie) Stock
- 1/2 Cup Arugula (rough chopped)
- 1/4 Cup Chopped Pistachios
- 1/4 Cup Crumbled Feta Cheese
- Zest from 1 Lemon
- Black Pepper (to taste)
HONEY-LEMON VINAIGRETTE- Juice from 1 Lemon
- 2 TSP Champagne Vinegar
- 2 TSP Water
- 1 TSP Dijon Mustard
- 1 TBSP Honey
- 1/2 Cup Extra Virgin Olive Oil
- Salt & Pepper to taste
Instructions- Rinse Farro and cook to to package instructions (approx. 30 minutes in total)- tasting occasionally (see notes).
- While Farro is cooking, chop arugula and pistachios. Add to mixing bowl. Zest one lemon into the same bowl and add crumbled Feta. Set aside.
- Whisk together the vinaigrette ingredients until smooth and well blended.
- One Farro is cooked, strained, and cooled down, add to mixing bowl and toss, adding black pepper to taste.
- Add dressing in slowly to preference. Platter and serve.
Notes- *Depending on the brand of Farro, I usually end up pulling it off the burner 5 minutes or so before the package instructions to avoid it getting too soft.
saristotle https://saristotle.com/ -
Vegan Stuffed Portabella Mushrooms
First off, I’m not a vegan, but I’m just not always in the mood for a heavy meal- anyone else agree?

It’s always good to have some meat alternatives in the recipe box for days like this. They can also be pulled out during lent or other periods of fasting throughout the year or even as an unexpected dinner accompaniment when having guests over.
The Portabella’s are stuffed with Cannellini Beans, Sundried Tomato, Garlic, and Fresh Spinach, & then topped with crunchy Panko Breadcrumbs to add texture. I serve this over a bed of wilted Cherry Tomatoes (recipe can be found in previous post) to give it somewhat of a sauce, tying it all together.
The meatiness of the Portabella and Cannellini beans make this dish filling and satisfying but guilt free for those of you who are trying to lead a healthier or “plant based” lifestyle.
This recipe acts as a great appetizer as well. If you are looking for a more “bite sized” option, you can easily replace the Portabella’s with Cremini or Button Mushrooms.
Vegan Stuffed Portabella Mushrooms2018-04-20 13:59:45PrintIngredients- 4 Portabella Mushroom Caps (stems removed and inner "gills" scraped out)
- 1 16oz Can of Cannellini Beans (drained and rinsed)
- 7-8 Sundried Tomatoes
- 2 Cloves Fresh Garlic
- 2 Cups Fresh Spinach Leaves
- 1/2 Cup Panko Breadcrumbs (seasoned)
- Extra Virgin Olive Oil
- Salt & Pepper (to taste)
Instructions- Preheat oven to 375 degrees.
- Remove stems and scrape "gills" from mushroom caps with a spoon. Rinse well and set aside, covering with a damp paper towel to prevent discoloration.
- In a blender, add Cannellini beans, garlic, & sundried tomatoes and blend together (adding olive oil slowly until desired texture is achieved). Transfer into a mixing bowl.
- Rough chop fresh spinach leaves and add to a frying pan drizzled with olive oil. Stir for about 1 minute or until leaves are wilted. Add spinach to the same mixing bowl as the bean mixture and fold in gently. Season with salt and pepper and spread onto the mushroom caps.
- Line a baking sheet with aluminum foil and apply non-stick cooking spray. Add mushrooms to the baking sheet and top with seasoned Panko breadcrumbs.
- Bake for 15-20 minutes or until the breadcrumbs become golden brown. Serve with a light tomato broth.
saristotle https://saristotle.com/ -
Slow Roasted Chicken Noodle Soup
There’s just something about a bowl of homemade Chicken Noodle Soup on a rainy day..or when you’re not feeling well…or for no reason at all.

Since Spring is taking its sweet old time getting here, I might as well share some chilly day favorites! This recipe is my famous “corner cutting” Slow Roasted Chicken Noodle Soup that I receive SO many compliments on. I’ve been told by several people this is the best chicken soup “they’ve ever had.” (humble brag) and it is very easy to make, since I (not so) secretly use a store bought Rotisserie Chicken instead of making it myself.
While I love to make chicken or turkey soup from scratch when the opportunity presents itself, being a home cook-most times only for two people, there are not many instances when I have enough chicken bones on hand to make a homemade stock and the Rotisserie Chicken goes a long way in making the soup feel as if
 it was cooked down for much longer. Also, anyone who knows me well, knows that I throw EVERYTHING away that’s not nailed down, so if I’m not making the stock from scratch right at that moment, it’s not happening at all!
 The other upsides of using Rotisserie Chicken is that it has a great tender texture, shreds easily, saves a whole lot of time, tastes great, and is less expensive than buying and roasting your own. Most grocery stores sell these for no more than $5.99 which is a great way to stretch a buck.
Everyone has their own preference on the broth of the soup, be it chicken base, stock, bouillon cubes, etc. I prefer to use bouillon cubes. I am a creature of habit and have always made it this way although there is no “wrong” way!
Slow Roasted Chicken Noodle Soup2018-04-16 18:04:57PrintIngredients- 1 (cleanly) Shredded Rotisserie Chicken (breast meat only)
- 1/4 Cup Extra Virgin Olive Oil
- 1 Medium Yellow Onion (small diced)
- 3-4 Stalks of Celery (chopped)
- 3-4 Carrots- or the Equivalent, 12-14 Baby Carrots (diced)
- 2 Cloves Fresh Garlic (whole)
- 2 Quarts of Water
- 6-7 Chicken Bouillon Cubes
- 2 Bay Leaves
- 3-4 Shakes of Dried Thyme- or a Few Sprigs of Fresh Thyme (at the end)
- 1 TBSP Grated Parmesan Cheese
- Black Pepper (to taste)
- 1 TSP Chopped Fresh Parsley
- 1/2 LB Egg Noodles (cook separately)
Instructions- In a pot of salted boiling water, cook Egg Noodles to "al dente" and set aside.
- In a cast iron dutch oven (or metal stock pot), heat olive oil and add in carrots, onions, celery, & garlic. Sweat down for 5-7 minutes (stirring often so they do not brown). Add in shredded chicken and stir to combine well. Add 2 quarts of water, bouillon cubes, dried thyme, and bay leaves. Bring to a simmer. Partially cover with a lid and reduce heat to low. Cook for 45-60 minutes (stirring occasionally). Add parmesan cheese and black pepper (to taste). Turn off heat and discard whole garlic cloves & bay leaves. Serve hot over egg noodles and top with black pepper and fresh parsley. Enjoy!
Notes- *Taste soup before seasoning. I often times will NOT add any additional salt to this dish.
saristotle https://saristotle.com/ -
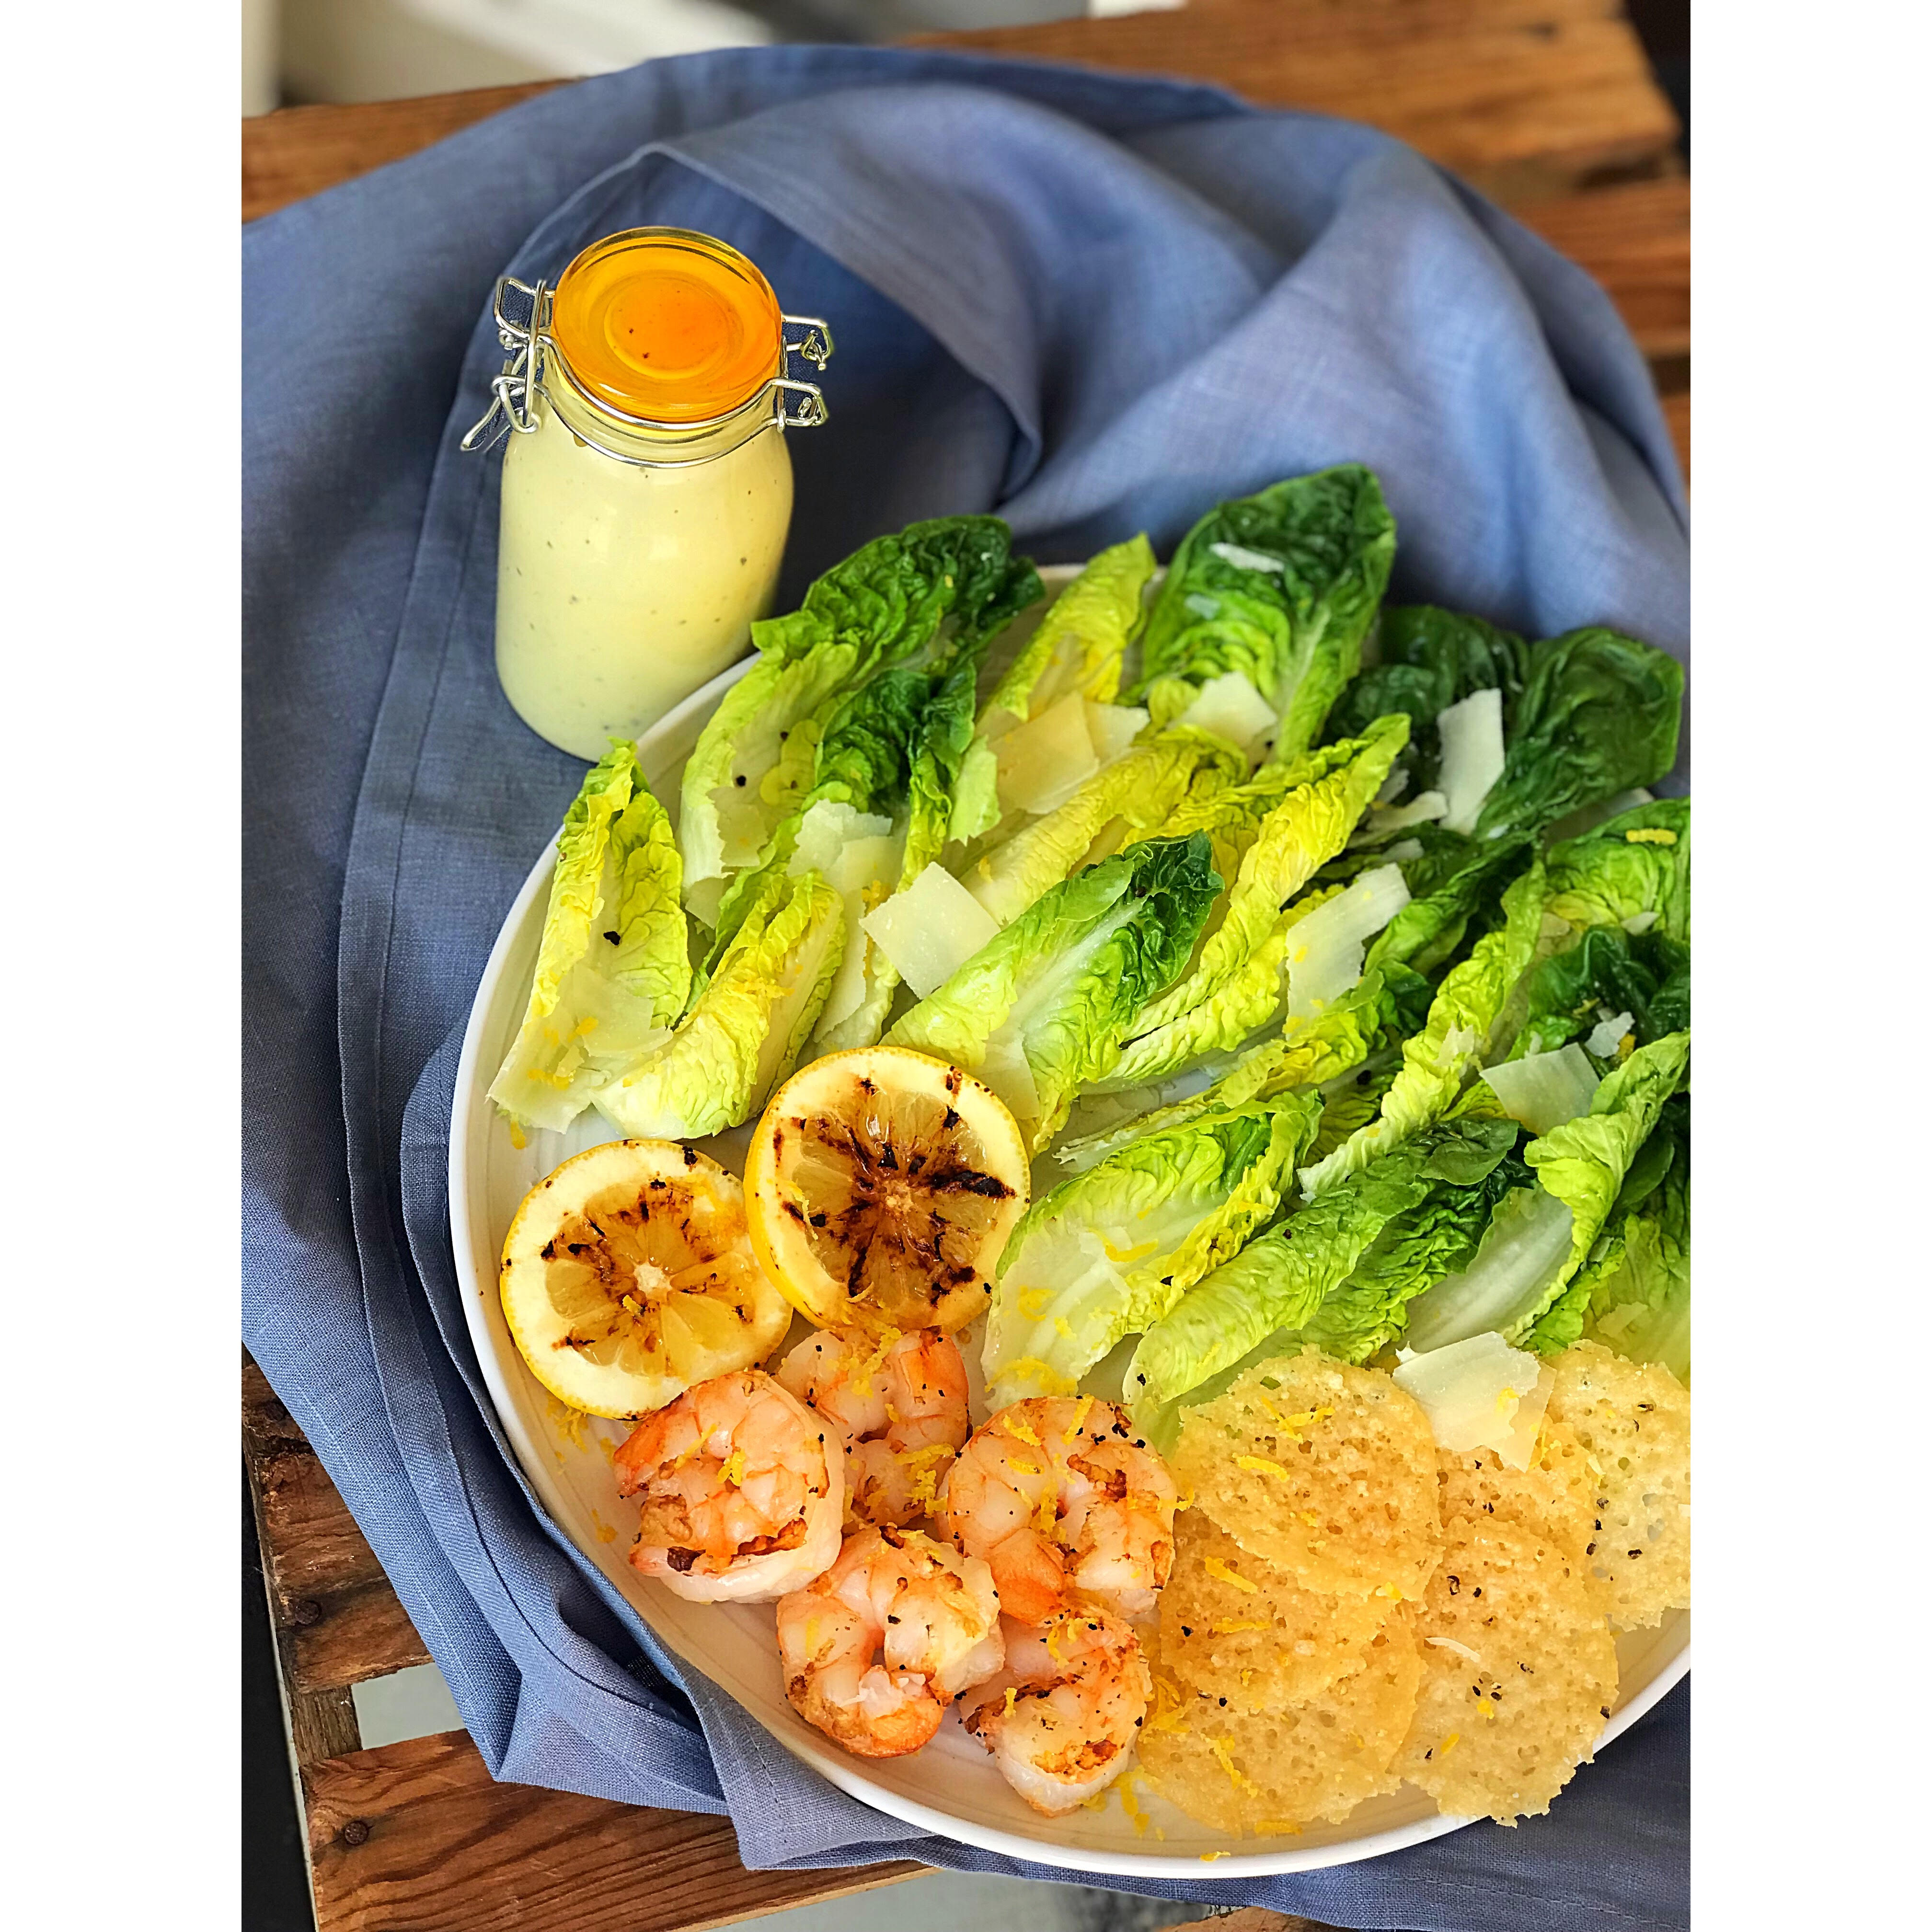
Scratch Made Caesar Salad

Do you ever go to a good steakhouse and wonder why their Caesar Salads seem to taste way better than any others?
The simple explanation is that they make it from scratch using only the highest quality ingredients- and that goes a long way.
Nothing screams SUMMER quite like a good Caesar salad and while anyone can throw the basic version together quickly with store bought dressing, the quality of making it from scratch puts it at a higher level and is totally worth the added time to prepare it.
There are many approaches to constructing this salad. I personally make it several ways myself, depending on what mood I’m in. For this post, I simply just used what I had in the house, which was grilled shrimp and Little Gem Romaine Lettuce.

Since I try to keep my Caesar from becoming too fattening, I did opt out of adding in croutons, but everyone has their own preferences so I encourage you to adjust the dish to your own liking. I hope you enjoy!
Scratch Made Caesar Salad2018-04-14 13:47:09PrintCAESAR DRESSING- 1 Egg Yolk
- 1/2 Tsp Dijon Mustard
- 1 TBSP Mayonnaise
- 1/2 Cup Reggiano Parmesan Cheese
- Zest from 1 Lemon
- Juice from 1/3 Lemon
- 1 TSP Champagne Vinegar
- 1 Clove of Fresh Garlic
- 1/2 TBSP Anchovy Paste
- 1/3 Cup Extra Virgin Olive Oil
- 1/2 TSP Black Pepper
- Salt (to taste)
PARMESAN TUILES (cheese crisps)- 1/2 Cup Fresh Grated Reggiano Parmesan
SALAD- Romaine Hearts
- Shaved Parmesan Cheese
CAESAR DRESSING- In a mixing bowl, add all ingredients and whisk together until well-combined. Transfer into a blender and lightly blend until the dressing yields a smooth consistency. Refrigerate until ready to use.
PARMESAN TUILES- Preheat oven to 350 degrees. Place grated Parmesan cheese onto a foil lined baking sheet into "cookie sized" piles an inch or two apart and press down gently to flatten. Bake for approximately 5-7 minutes or until they look laced and begin to become golden brown in color around the edges. Let cool for a minute or two and peel from foil.
SALAD- Assemble greens around serving platter and top with shaved Parmesan & fresh cracked black pepper. Add cheese crisps, and (if preferred) grilled chicken or shrimp. Drizzle with dressing and serve.
saristotle https://saristotle.com/ -
Bucatini with Cherry Tomatoes
This recipe, without question, has to be one of my top five favorite dishes to make (okay, and eat). That said, it also happens to be one of the easiest. This usually results in me making it FAR too often, but I somehow never tire of it.

Because this recipe for Bucatini with Cherry Tomatoes is one of my favorites, I wanted to share it with all of you!
One of the best parts of this dish is that although it is pasta, the sauce is so light, that it doesn’t feel like a guilty pleasure (although it definitely satisfies as one)! Alternatively, if you’re looking for a healthier option, the tomato mixture works exceptionally well over grilled chicken too!

Start to end, this dish takes only 15 minutes to make and smells incredible. It also acts as a great base for other dishes (i.e Zuppa di Pesce, etc.), so it’s a great recipe to keep on file in case you want to take it up a notch.
While just about any pasta will do (whatever you have in the house is fine), I find that Bucatini works really well in this dish and gives it the right texture that brings it all together. For that reason, I always make sure to have the Bucatini and Cherry/Grape Tomatoes in the house so I can throw this together in a hurry on those nights I’m crunched for time, but still prefer a home cooked meal over ordering takeout.
Bucatini with Cherry Tomatoes2018-04-13 17:14:15PrintIngredients- 1 LB Bucatini (or other type of pasta)
- 1/4 Cup Extra Virgin Olive Oil
- 4 Cloves Fresh Garlic
- 18oz Pack Cherubs "Heavenly Salad Tomatoes"
- 1/4 Cup White Wine
- 1/4 Cup Chicken Stock
- 1 TBSP Butter
- 2-3 Fresh Basil Leaves
- Salt & Pepper (to taste)
- Fresh Grated Parmesan Cheese (for topping)
Instructions- Boil a pot of salted water and cook pasta to package instructions. Drain & set aside.
- Slice tomatoes in half. Smash garlic & slice thinly.
- In a medium frying pan, add olive oil. Once hot, add in garlic and cook until light golden brown, stirring often. Add white wine, and cook until reduced. Add tomatoes & chicken stock and bring to a simmer. Add butter and cook until tomatoes begin to break down and make a sauce (but still retain their shape). Toss in fresh basil, salt, & pepper. Once the basil wilts, add cooked pasta to the tomato mixture until coated well- 1-2 minutes. Transfer into a serving dish. Top with more basil, black pepper, & (if desired) Parmesan Cheese. Enjoy!
Notes- White Wine Preference: Sutter Home Chardonnay
saristotle https://saristotle.com/